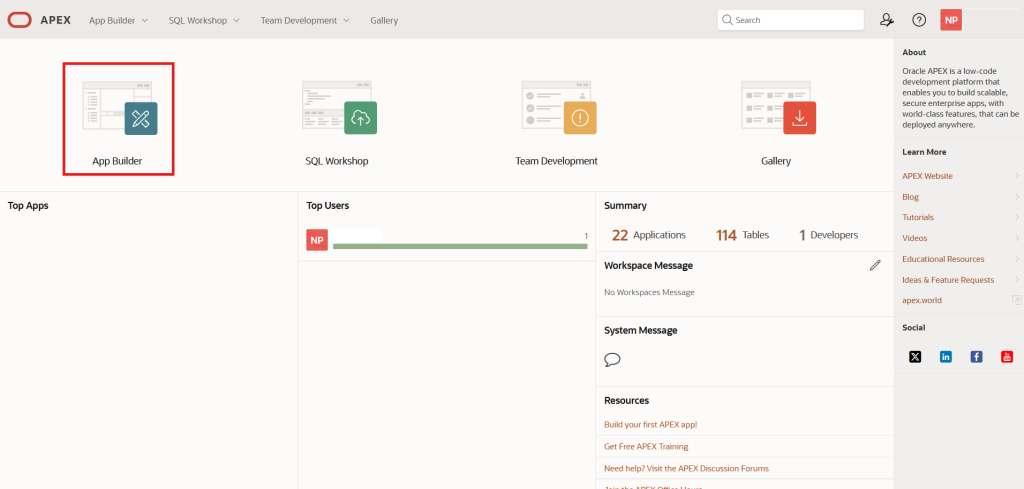
After logging in to the APEX Workspace, click the App Builder icon.
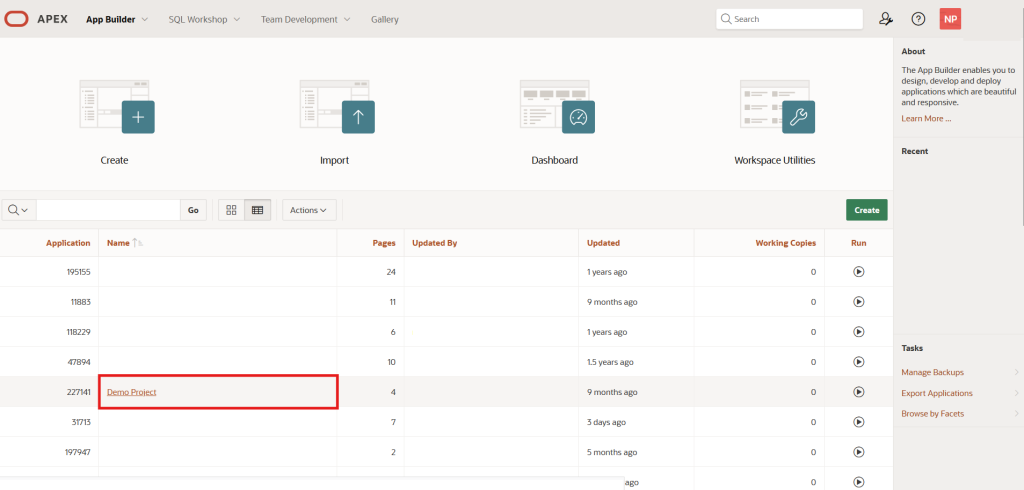
From the available applications, select the one you created earlier – In this example, I selected Demo Project web application.
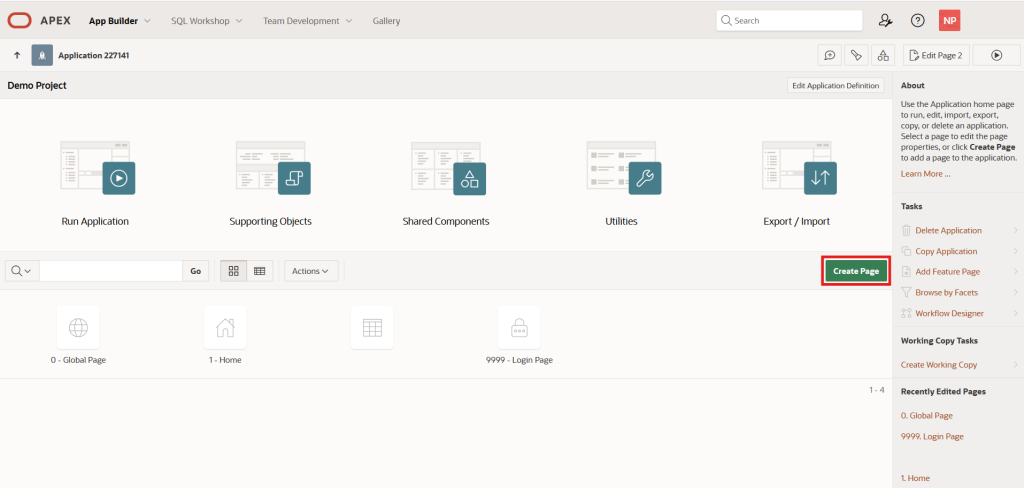
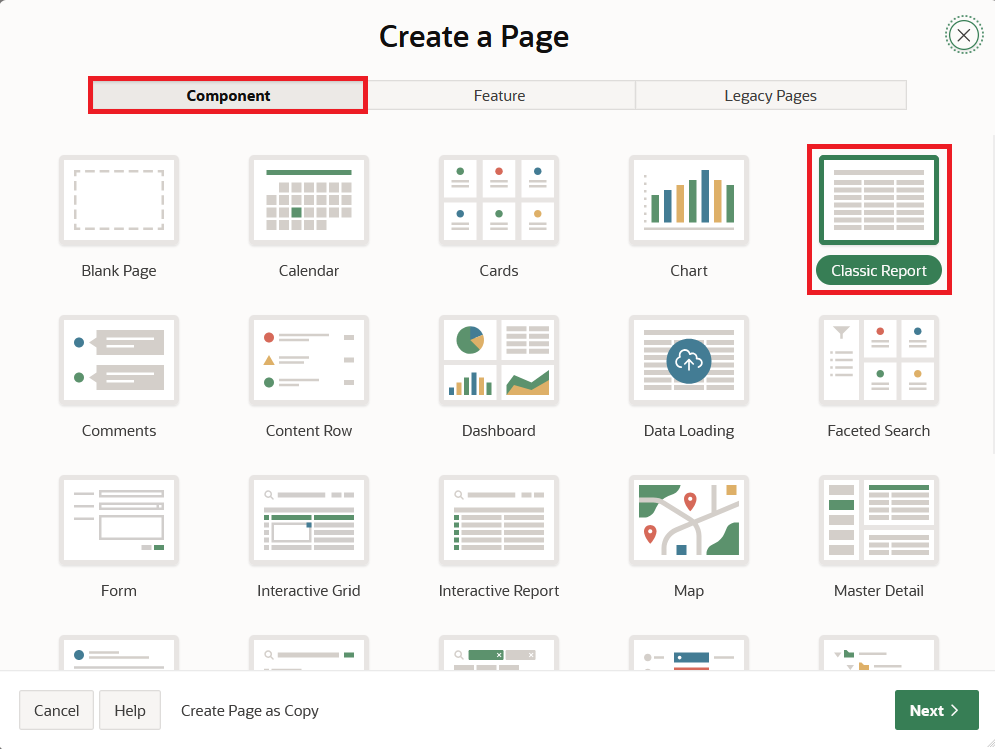
To create a new Classic Report page in APEX, click Create Page button.
Clicking the Create Page button opens the Create a Page dialog with three tabs: Component, Feature, and Legacy Pages.
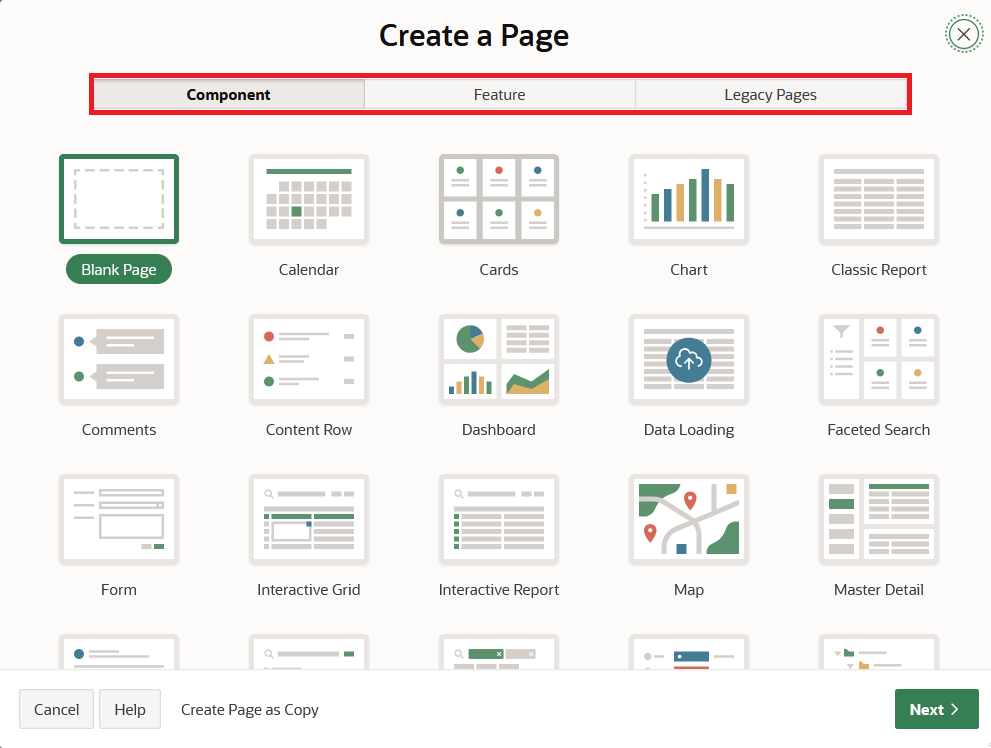
In the Component tab, click the Classic Report option.
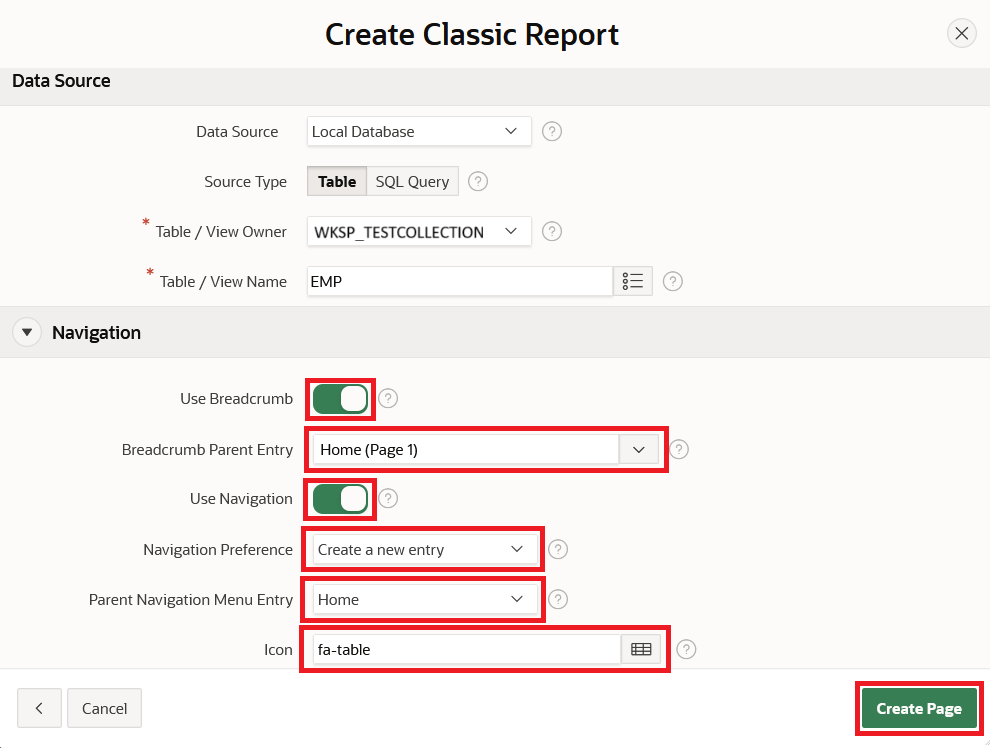
Selecting the Classic Report option opens the Create Classic Report dialog, which contains three regions: Page Definition, Data Source, and Navigation.
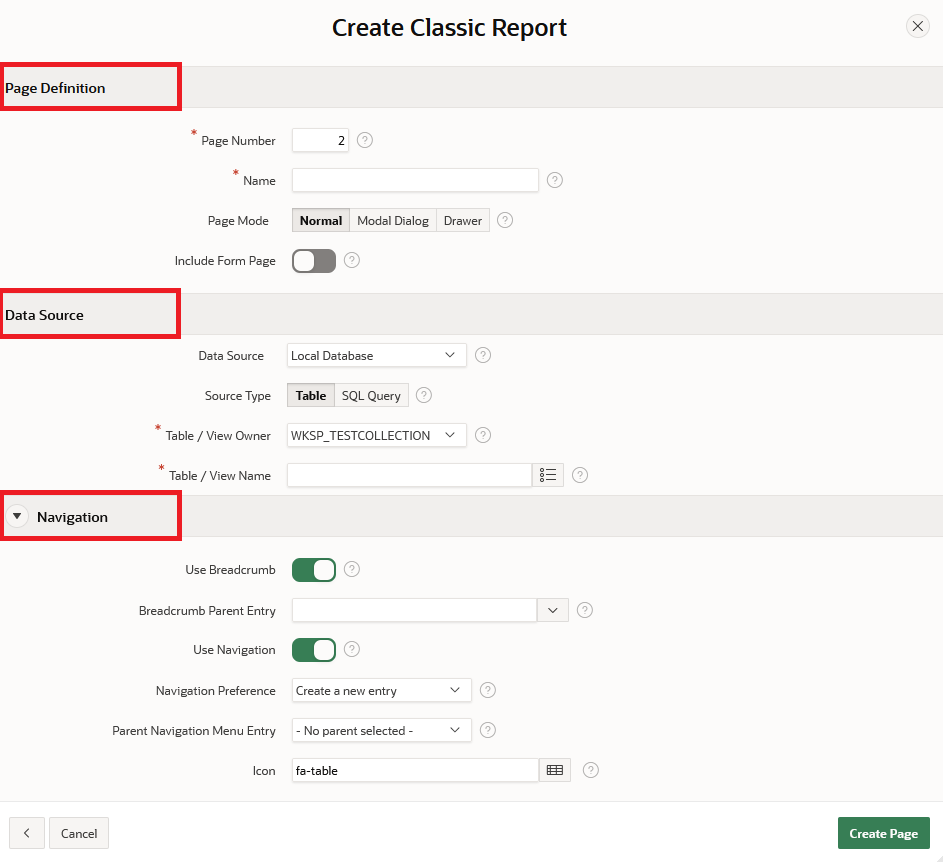
Under the Page Definition region, set the following page properties.
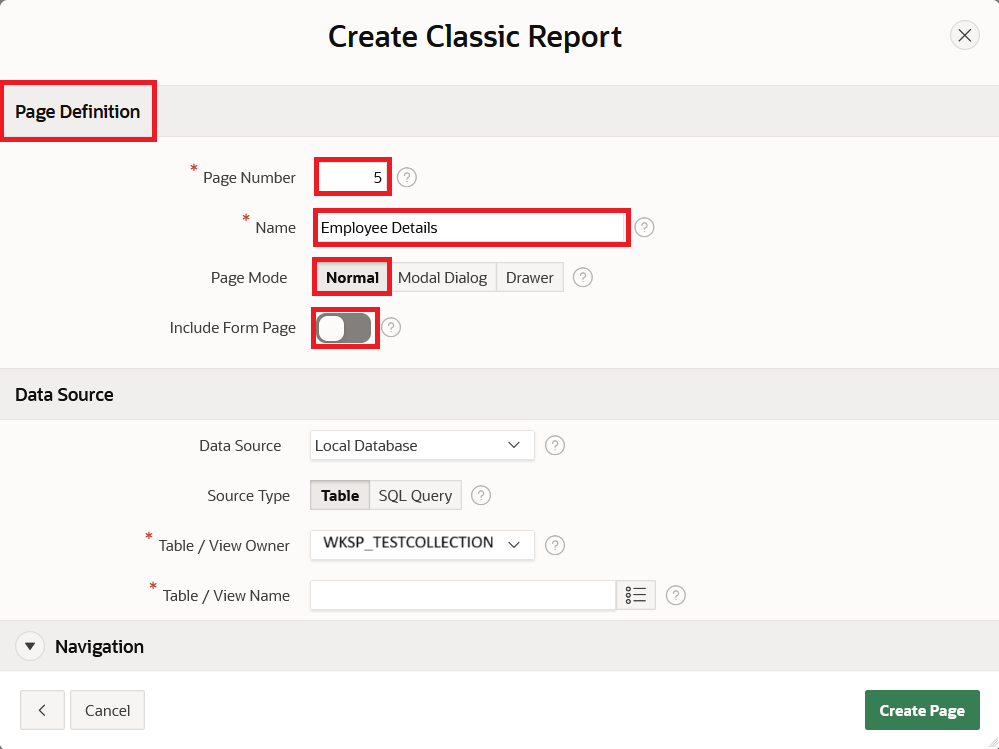
Page Number – Specifies the numeric identifier for the page. For this guide, we entered 5.
Name – Defines the label for the page. Here, we have set it to Employee Details.
Page Mode – Determines how the page is displayed. Here, we have selected Normal mode.
Include Form Page – Set this flag to add a form page with the report. Since a form is not needed here, set it to Disabled.
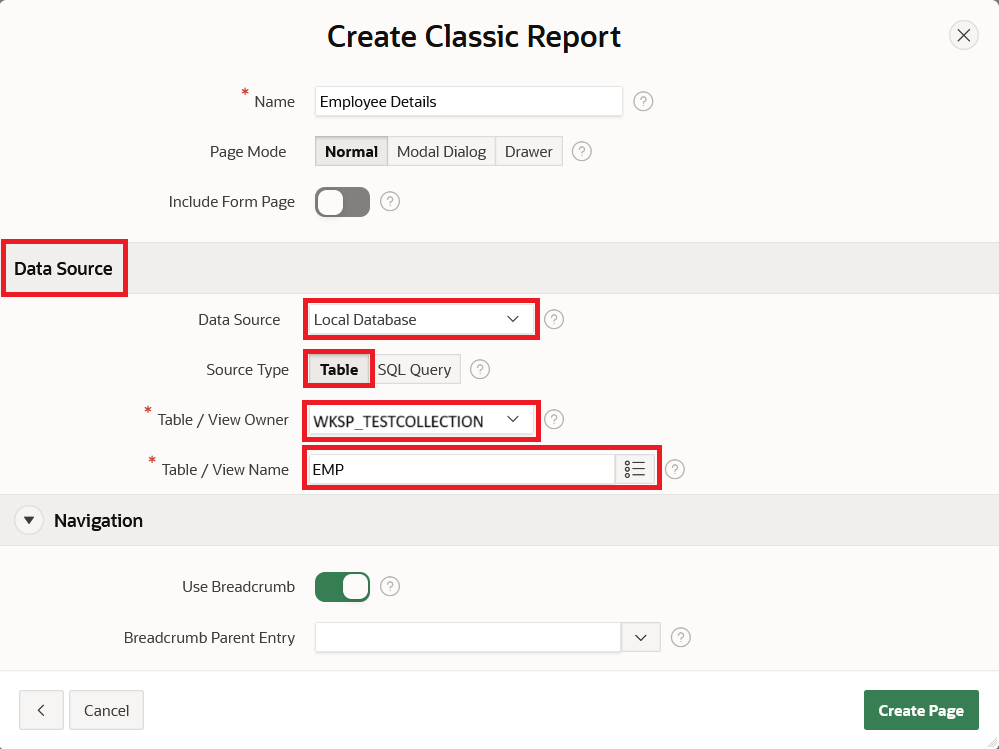
Within the Data Source region, specify the Classic Report settings/properties.
Data Source: Choose the source from which the Classic Report will retrieve its data. Here, we have set Local Database.
- Local Database: Retrieves data from the local database.
- REST Enabled SQL Service: Sources data from a remote database connection defined in Shared Components > REST Enabled SQL.
- REST Data Source: Sources data from a RESTful web service defined in Shared Components > REST Data Sources.
- JSON Source – Sources data from a JSON Source defined in Shared Components > JSON Sources.
Source Type: Choose the data source for the new Classic Report page. For this guide, we have set Table.
- Table/View: Uses a database table or view as the data source.
- SQL Query: Uses a custom SQL query to retrieve data.
Table/View Owner: Specifies the schema where the source table or view resides; by default, this is the workspace schema WKSP_TESTCOLLECTION.
Table/View Name: Select the table or view on which the page will be based; in this example, enter EMP.
In the Navigation region, set the following navigation properties.
Use Breadcrumb: Turn this flag On to create a breadcrumb entry; By default, the page name becomes the entry name.
In our case, we enabled the Use Breadcrumb flag.
Breadcrumb Parent Entry – Select parent breadcrumb entry for the current page, select No Parent Entry for top level page.
In our case, the top entry is Home (Page 1).
Use Navigation – Set this flag to On, if you want to use navigation for this page.
In our case, we enabled the Use Navigation flag.
Navigation Preference: Choose how to add this page to the Navigation Menu, either create a new entry or map to an existing entry.
- Create a new entry: lets users access the page from the Navigation Menu; it can be placed anywhere in the hierarchy, by default the page name is used as the entry name.
- Map to an existing entry – links the new page to a top-level menu entry; since users can’t access it directly, add a button or link on the top-level page to open it.
In our case, we selected Create a new entry in the Navigation Preference.
Parent Navigation Menu Entry: select the parent of this entry
In our case, we set it as the Home page.
Icon: Choose the icon class for this entry; to pick an icon, use the built-in icon picker.
In our case, we selected the fa-table icon, which appears in the Navigation Menu when the application runs.
Finally, click Create Page button after setting all navigation properties.
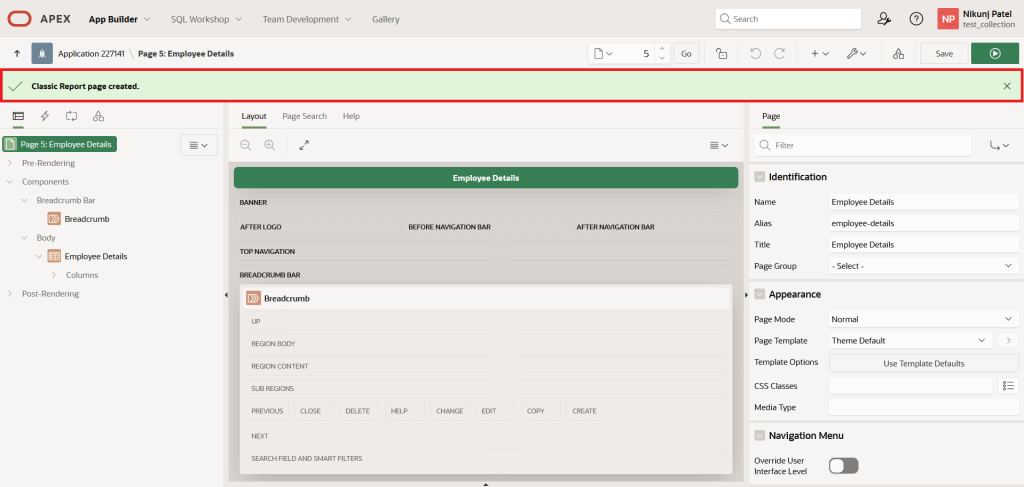
This is the APEX Page Designer UI, where you can view and set different properties of the page and its components.
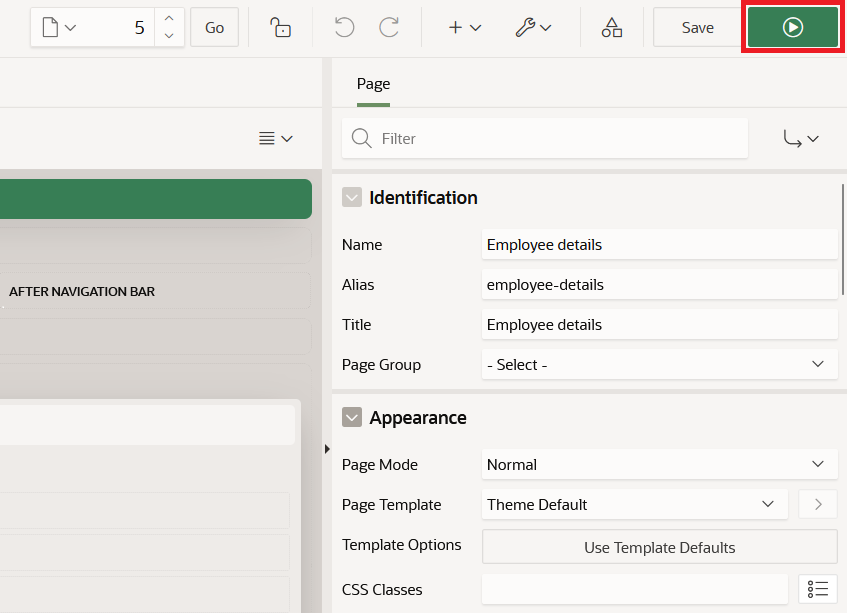
Click the Run button in Page Designer to run the page.
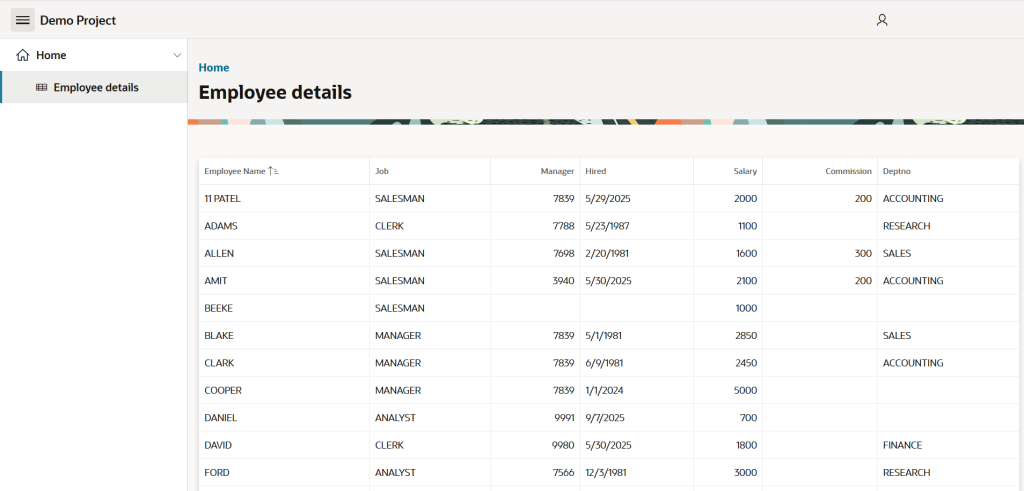
After running the page, APEX will render the Employee Details Classic Report and display it as shown below.
Changing the Classic Report Source Type:
We change the Classic Report Source Type from Table/View to SQL Query to make the report content dynamic in the future.
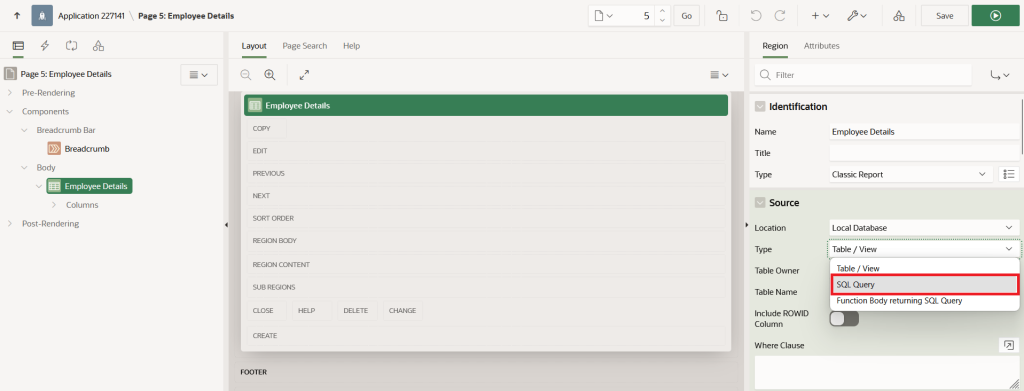
After switching to the SQL Query option, the Code Editor displays a system-generated query from the EMP table.
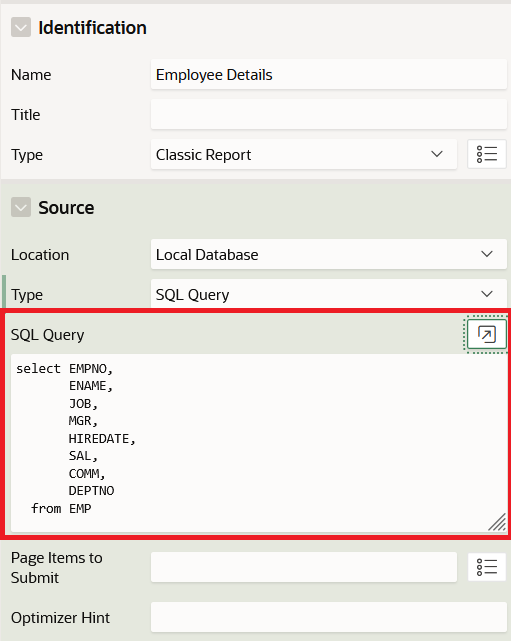
We can change the SQL logic in the Code Editor by clicking the Open Editor button.
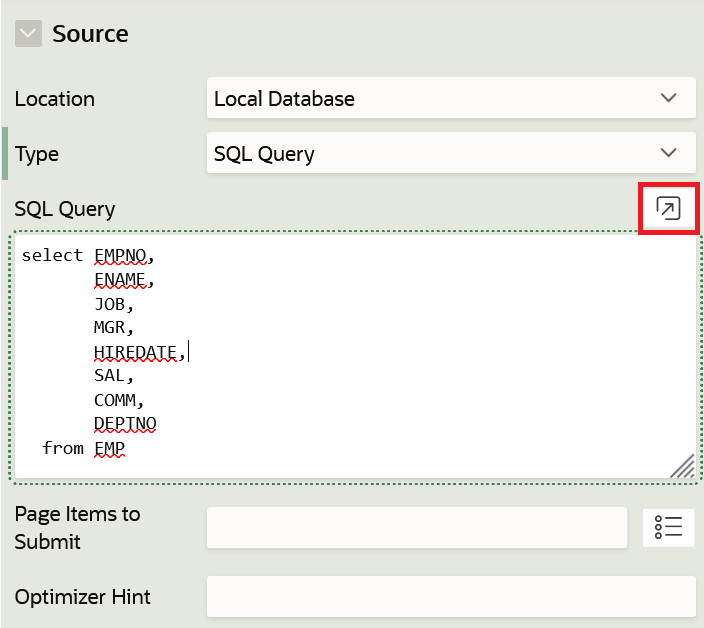
This opens the Code Editor dialog so we can modify the SQL query.
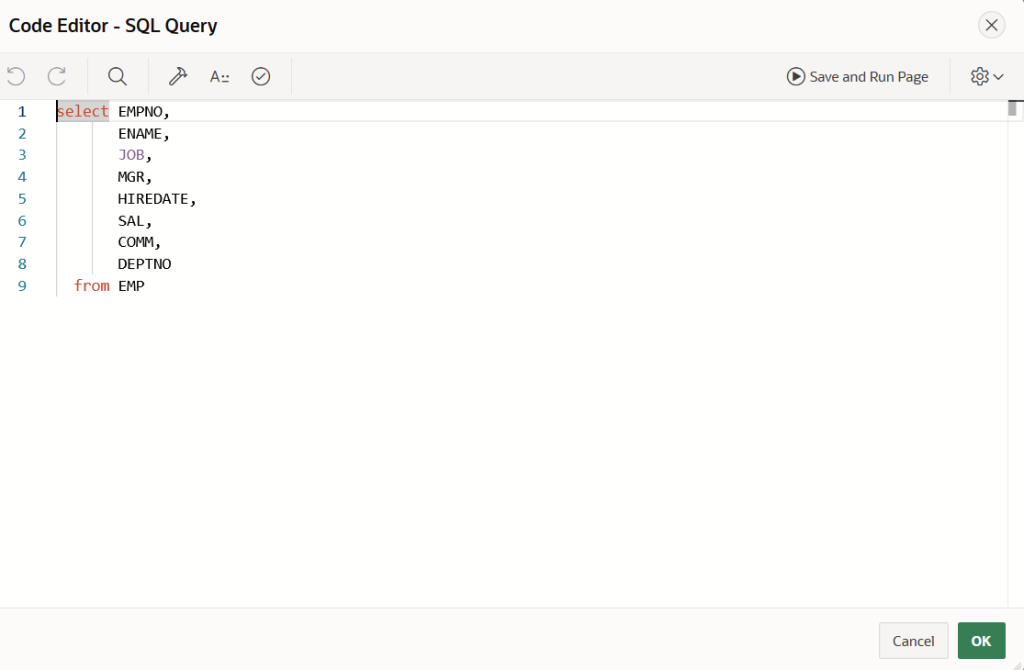
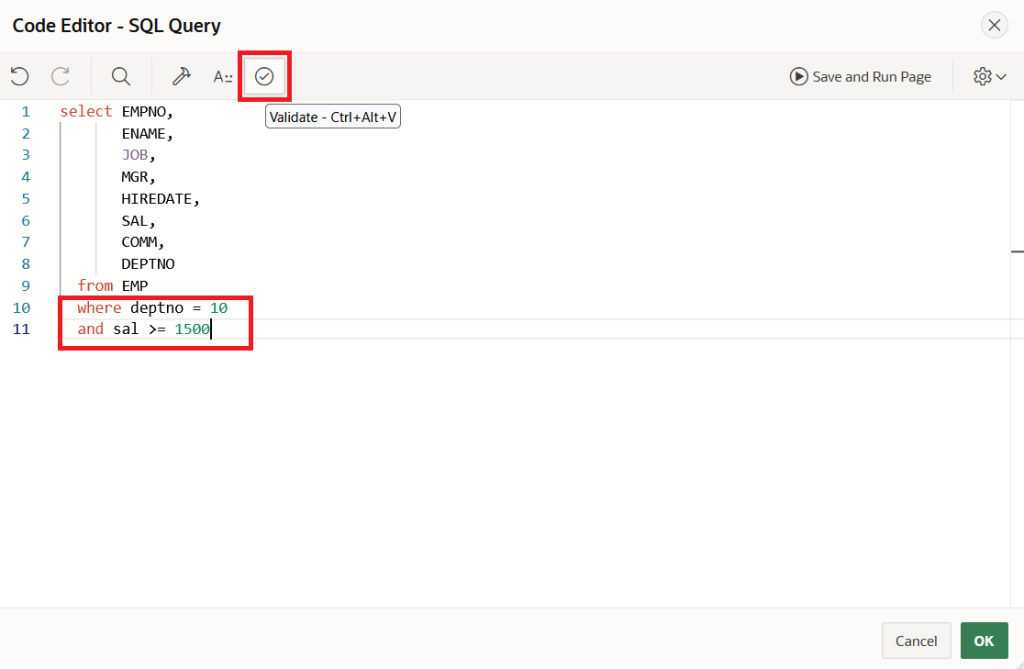
After updating the SQL query, use the Validate checkbox to validate query.
Click the Validate button, and if the SQL syntax is correct, the Code Editor shows a Validation Successful message.
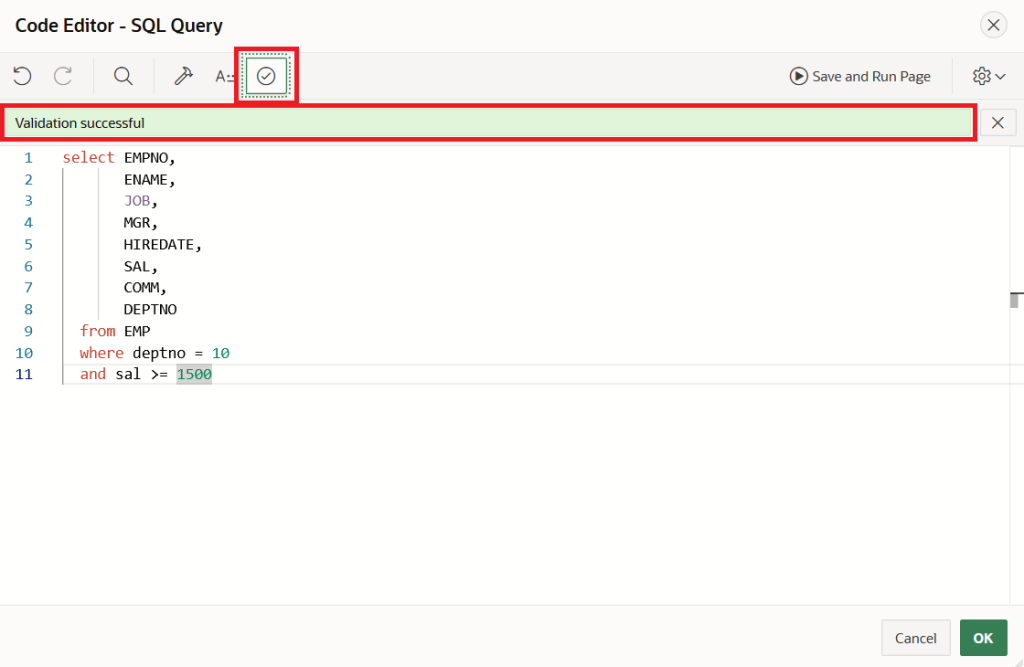
Once the SQL query is validated, click the Save and Run Page button in the Code Editor to run the page without closing the Code Editor dialog.

Here, the Classic Report shows employees who work in department 10 and have a salary of 1500 or more.
select EMPNO,
       ENAME,
       JOB,
       MGR,
       HIREDATE,
       SAL,
       COMM,
       DEPTNO
  from EMP
  where deptno = 10
  and sal >= 1500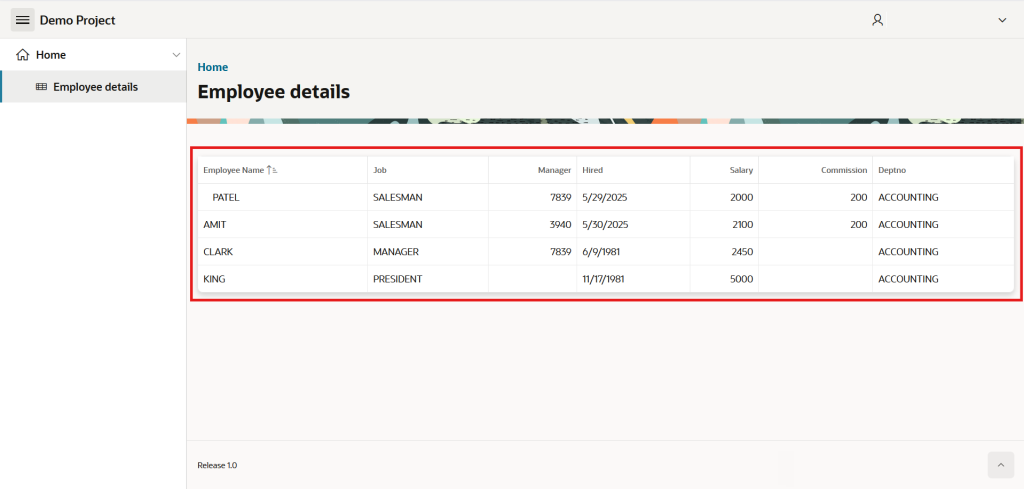
Now, we’ll see how to use an APEX Item to dynamically filter Classic Report records.
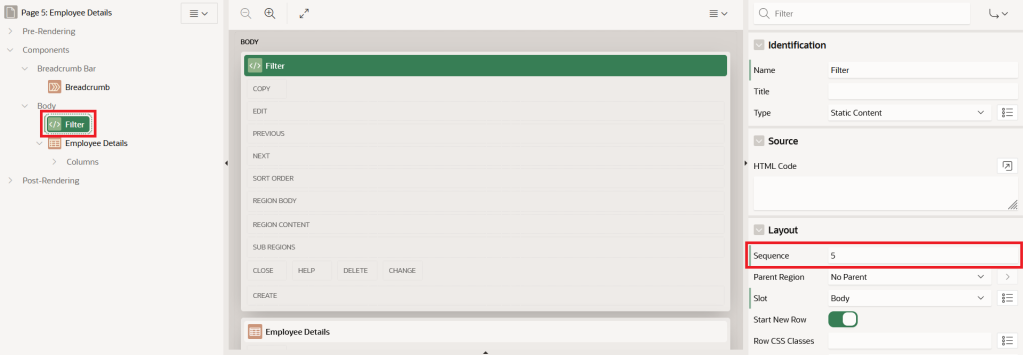
First, add a Filter region above the Employee Details classic report region and set Type = Static Content.
To add a Static region, right-click on the Body component of the page and select Create Region from the menu.
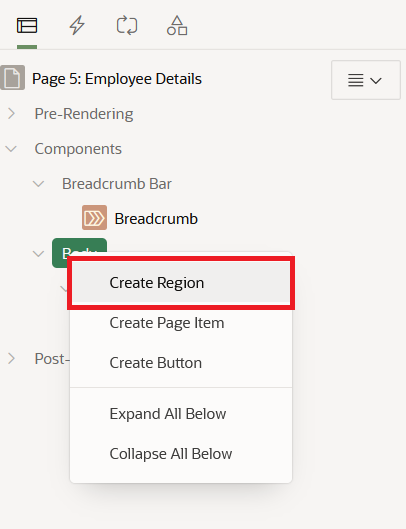
It will add a New – Static Content region below the existing Employee details Classic Report region
Now, name the new region Filter and set its Type to Static Content (the default region type in APEX).

By default, the new Filter region is placed below the Employee Details Classic Report, but we want it positioned above the Employee Details Classic Report.
Set the Filter region’s Sequence = 5 in the Layout section of the Filter Static Content region so it appears above the Employee Details Classic Report region, Which has Sequence = 10.
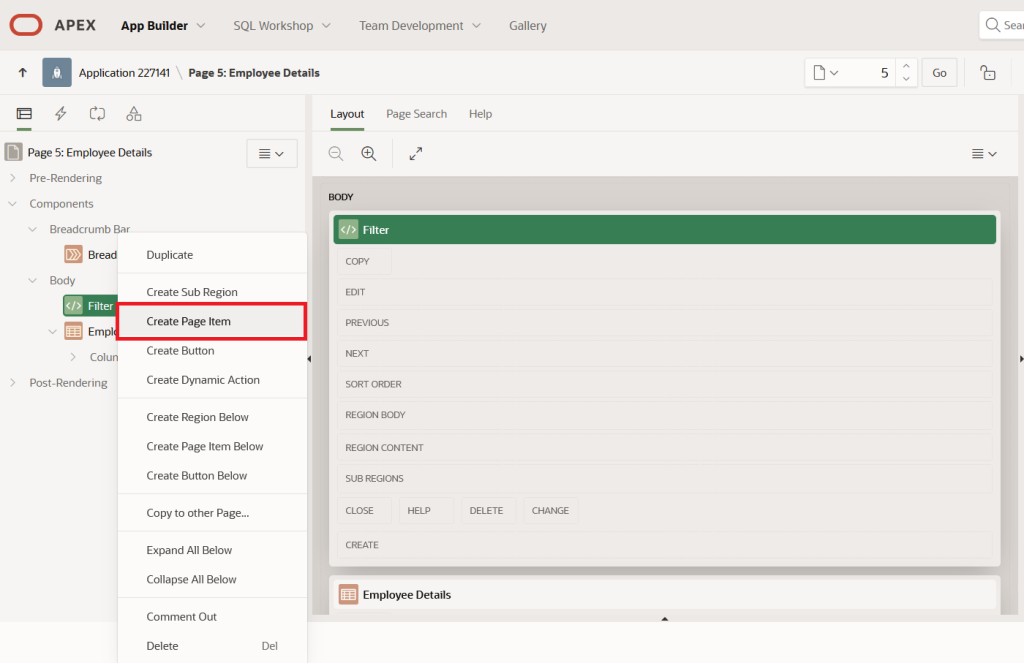
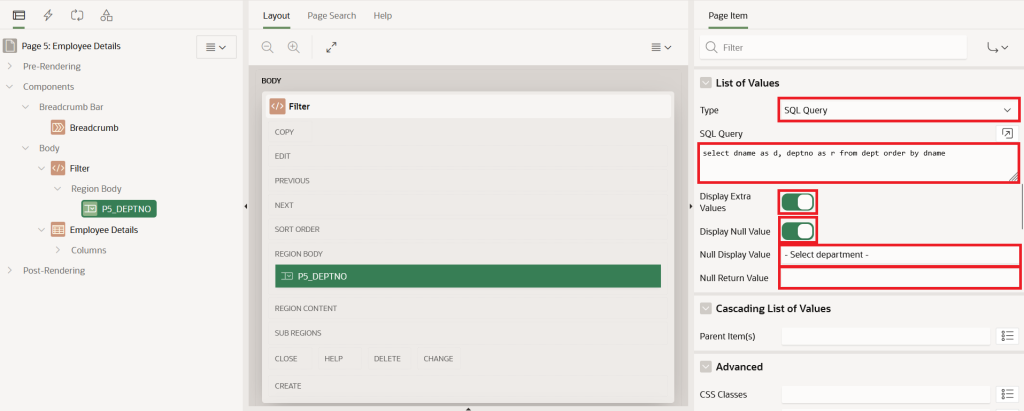
Add a Select List item P5_DEPTNO to the Filter region by right-clicking the region and selecting Create Page Item from the menu.
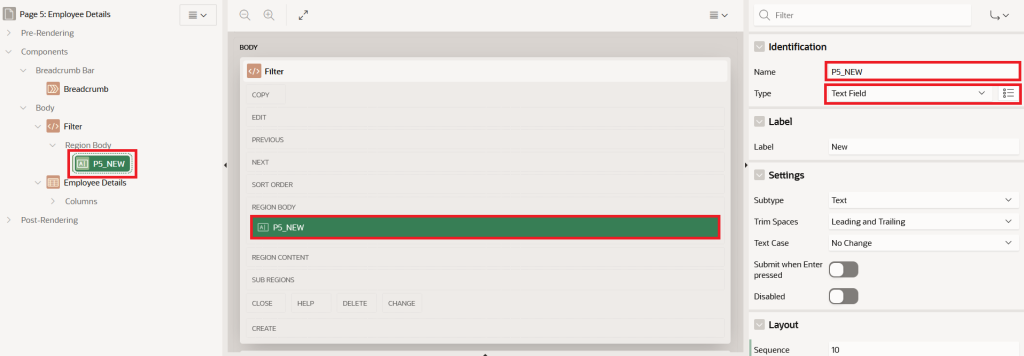
This adds a new item P5_NEW in the Filter region with default settings: Name = P5_NEW and Type = Text Field.
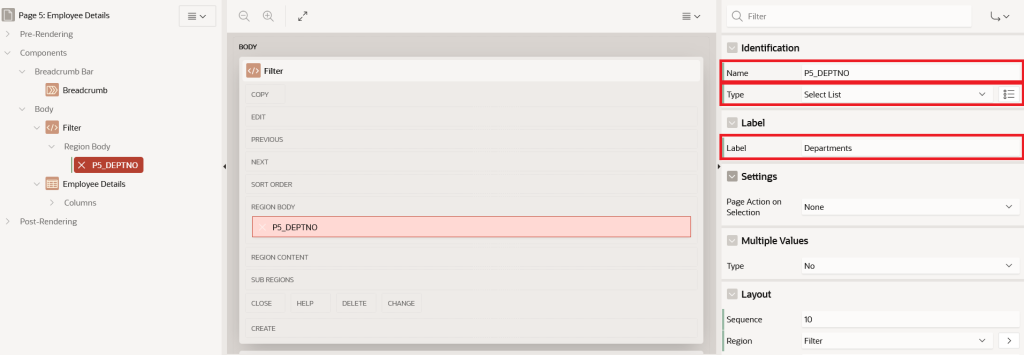
Change the default name from P5_NEW to P5_DEPTNO, set the Type to Select List, and set the Label to Departments
The Select List item P5_DEPTNO requires a List of Values (LOV).
For the Select List item P5_DEPTNO, the List of Values can be defined using Shared Component, SQL Query, Static Values, or a Function Body returning a SQL Query.
For now, select SQL Query as the List of Values Type and write the SQL query in the SQL query area as shown below.
select dname as d, deptno as r from dept order by dnameAlso, set the following properties:
Display Extra Values = On
Display Null Value = On
Null Display Value = – Select department –
Null Return Value = blank
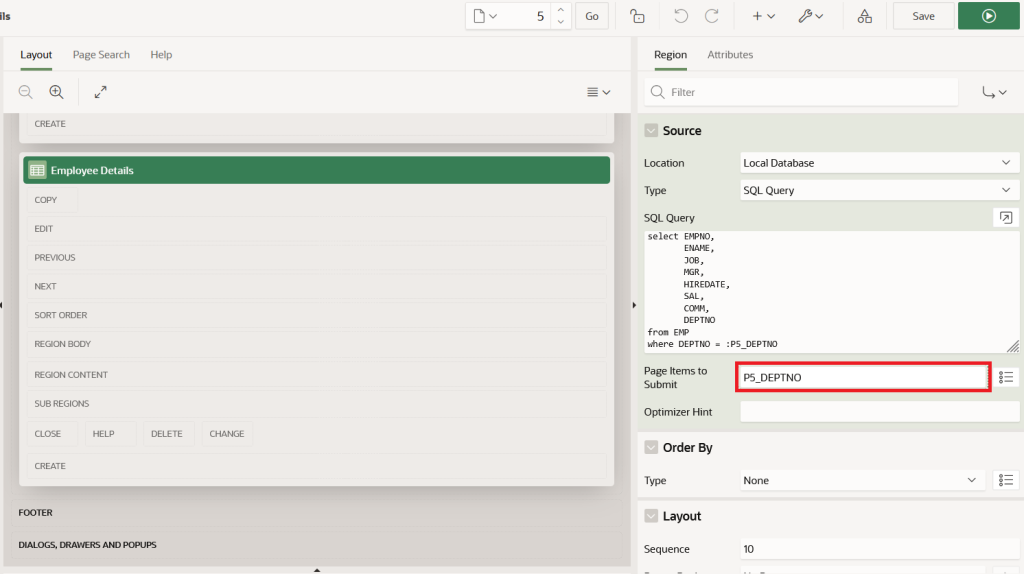
Now we’ll reference the P5_DEPTNO item as a bind variable in the SQL query of the Employee Details Classic Report region.
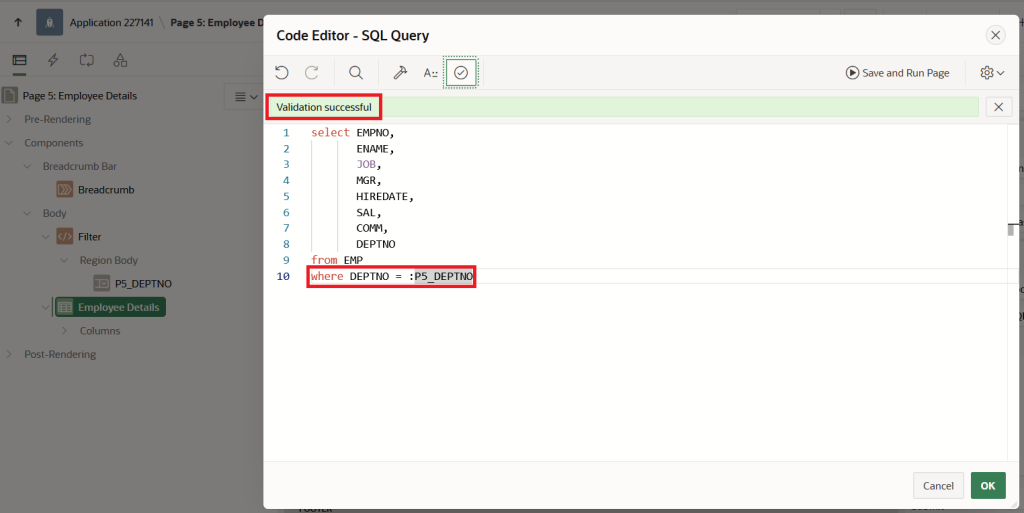
Now, Add P5_DEPTNO page item session state references into SQL query as follow; to do this add P5_DEPTNO in the
Page Items to Submit property
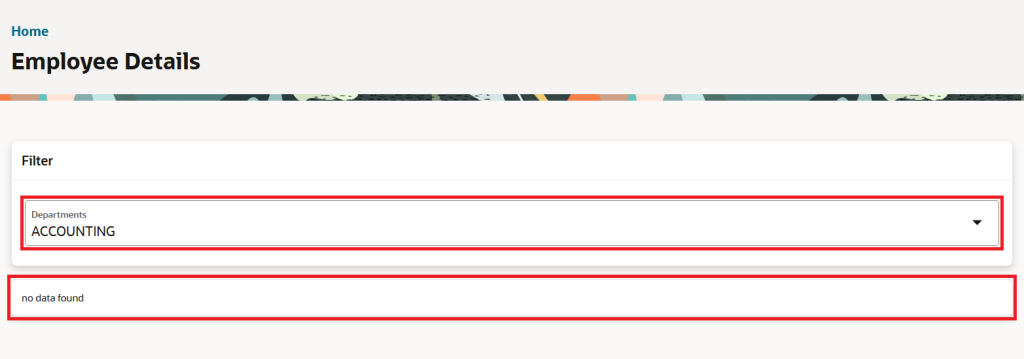
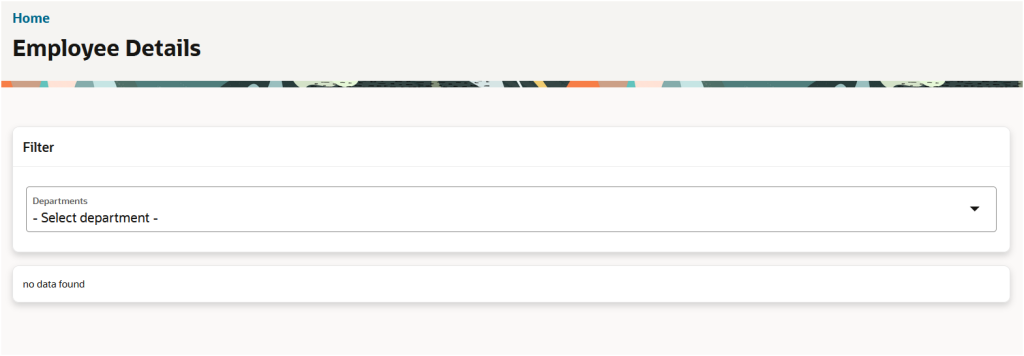
Now save the changes and run the page; the Employee Details Classic Report region shows a no data found message.
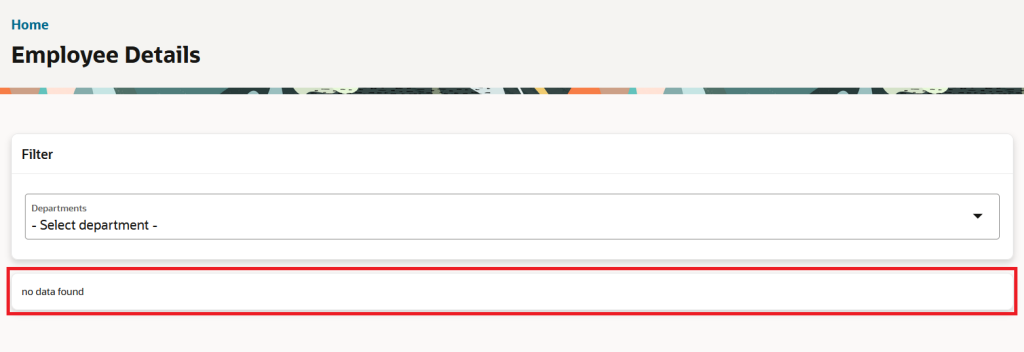
When you select a department from the Departments item, the Employee Details report still won’t show any data because we haven’t added a Dynamic Action on the Departments item to update the Employee Details Classic Report dynamically
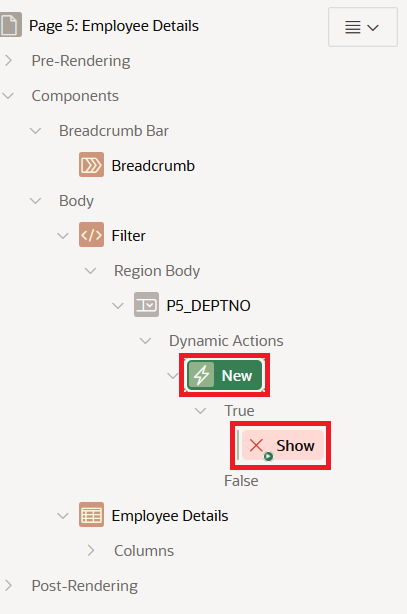
To display data dynamically in the Employee Details Classic Report, first add a Dynamic Action on the Departments item (P5_DEPTNO) from Page Designer.
In Page Designer, right-click the P5_DEPTNO Select List item and choose Create Dynamic Action from the menu

A new Dynamic Action is now added to the P5_DEPTNO Select List.
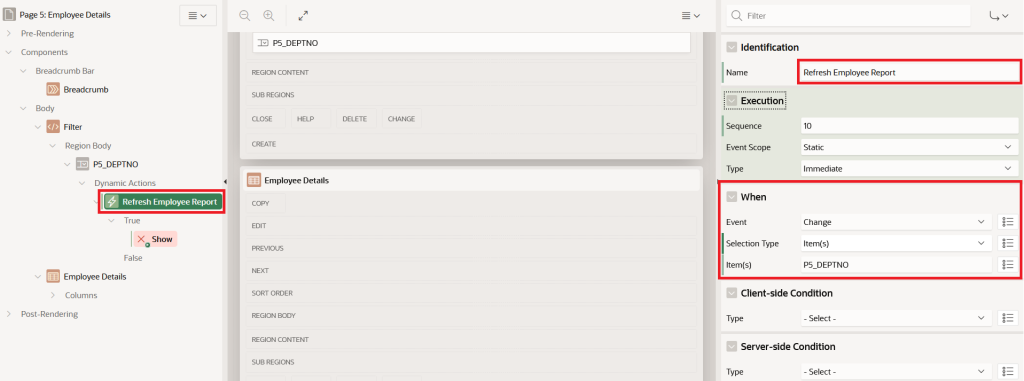
Set the Dynamic Action name to Refresh Employee Report.
In the When section, keep the default Dynamic Action properties assigned by APEX.
Event: Change
Selection Type: Item(s)
Item(s) = P5_DEPTNO
By default, the P5_DEPTNO Dynamic Action Refresh Employee Report has two sections: (1) True Action and (2) False Action.
The True Action is set to Show for P5_DEPTNO by default, but it shows an error in the Item(s) property of the Affected Elements section.
The False Action is empty by default.

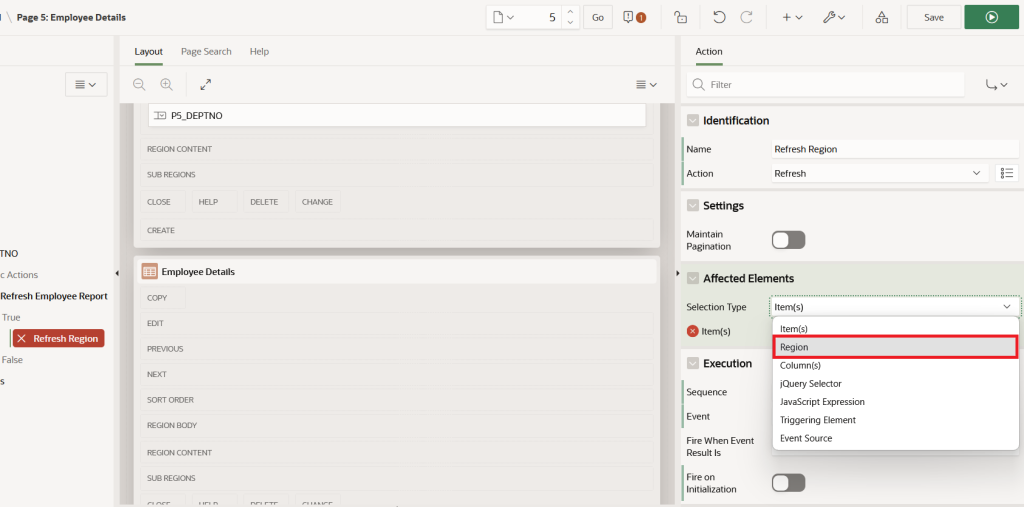
Now set the True Action name to Refresh Region and change the Action property to Refresh.
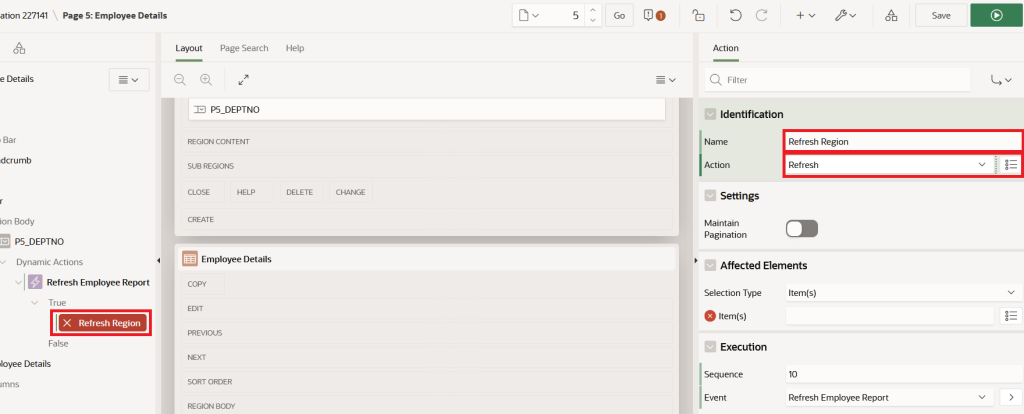
Now set the Selection Type property to Region in the Affected Elements section.
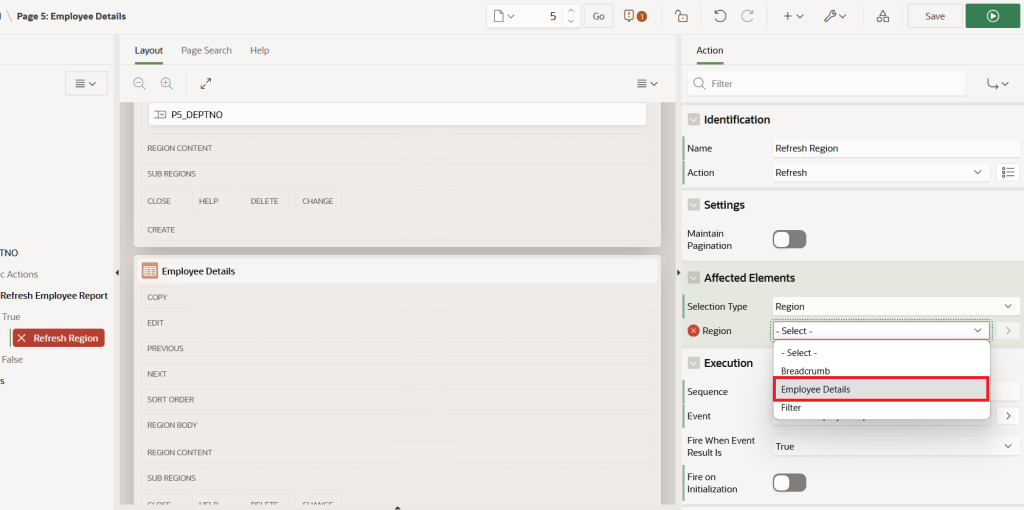
Once the Selection Type property is set to Region, set the Region property in Affected Elements section to Employee Details classic report region.
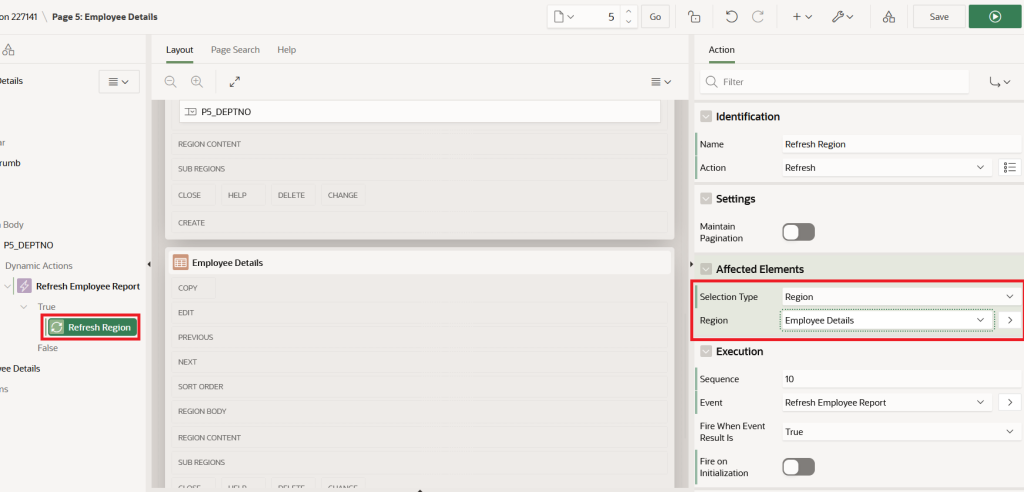
After setting the Region property to Employee Details, the Dynamic Action setup for P5_DEPTNO looks like this:
Now Save the changes run the page which will look following
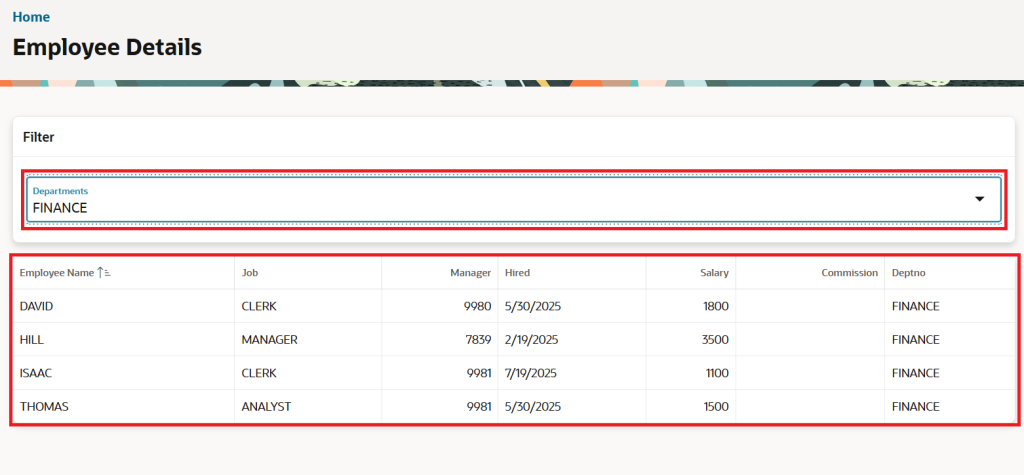
Now When we change the Departments select list values then it will display data dynamically in the Employee Details region
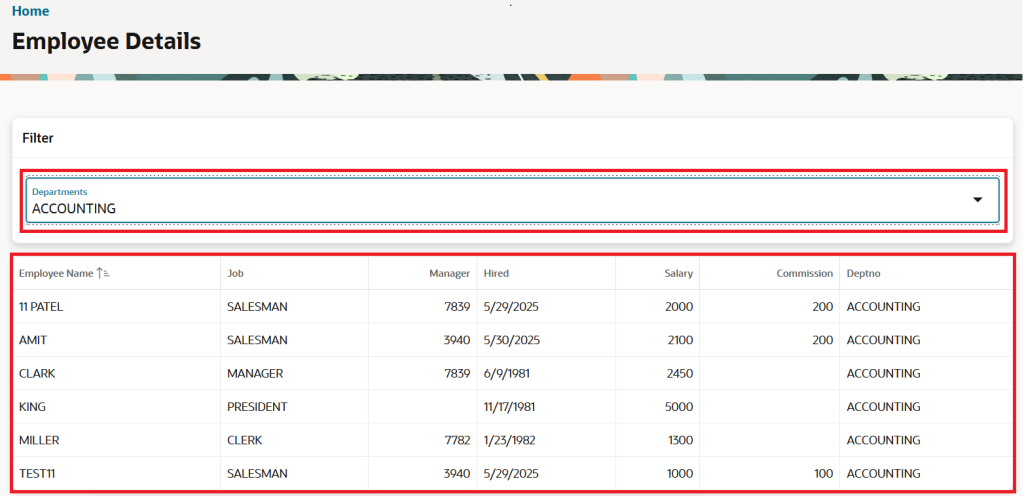
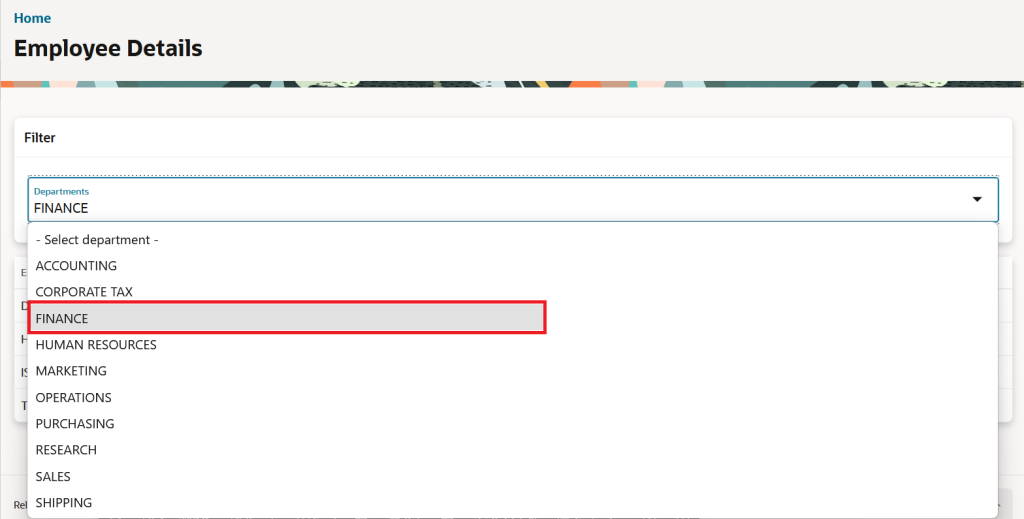
Now change the Departments Select List to another option, and the Classic Report will display data based on the selected value.
I welcome your thoughts or questions in the comments — I’d love to hear from you! Thanks for reading.