In real-world applications, data readability is very important.
When users open a report, they should immediately notice important rows such as:
- High salary employees
- Pending or overdue records
- Failed or critical statuses
- Exceptional or out-of-range values
Oracle APEX provides multiple ways to highlight report rows based on conditions, without writing complex code.
Using conditional row highlighting, you can make your reports more visual, user-friendly, and meaningful.
In this guide, we will learn step by step how to highlight report rows in Oracle APEX using simple and practical techniques.
What Is Conditional Row Highlighting?
Conditional row highlighting means:
- Changing the background color, text color, or style
- Based on data values in a row
Example:
- Salary > 50,000 → Highlight row in green
- Status = ‘PENDING’ → Highlight row in yellow
- Status = ‘FAILED’ → Highlight row in red
This helps users understand data faster without reading every column.
Prerequisites
Before proceeding, make sure you have:
- Oracle APEX workspace access
- A table or view (example: EMP table)
Step 1: Create a Classic Report
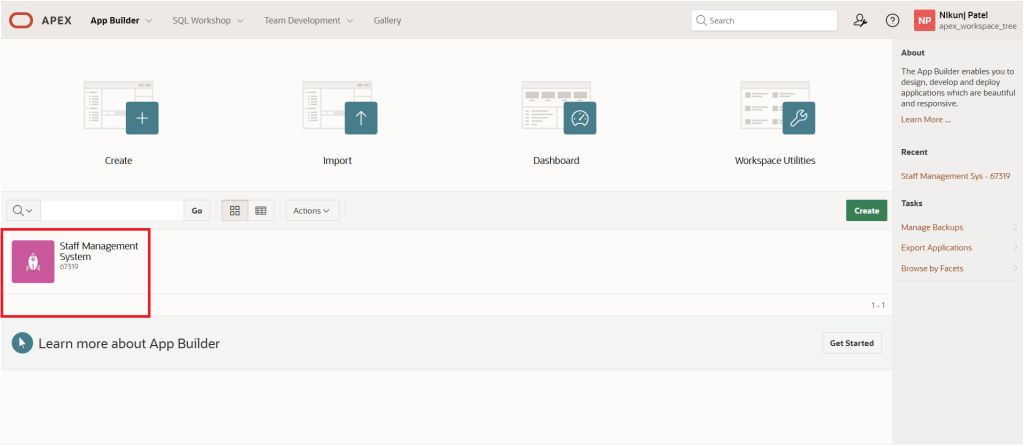
First, select the web application in which you want to create an Oracle APEX Classic Report. In our case, we have chosen the Staff Management System application.
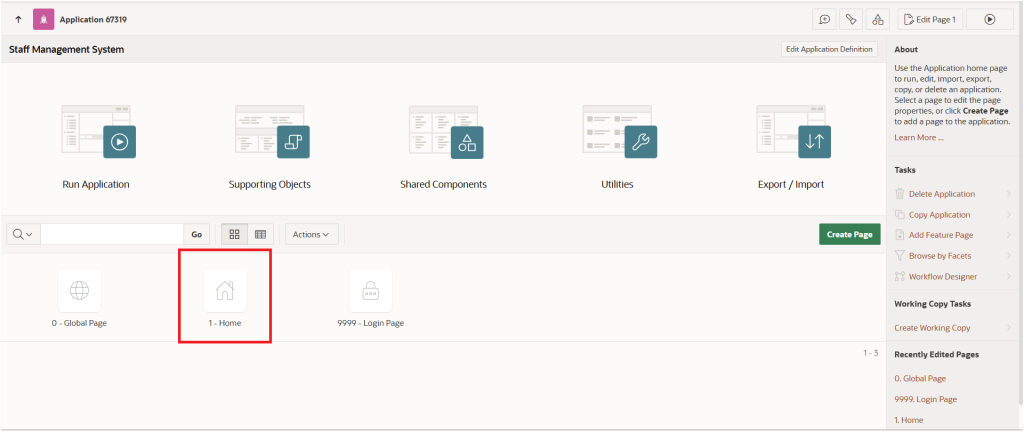
Next, select the Home page where we will create the Classic Report.
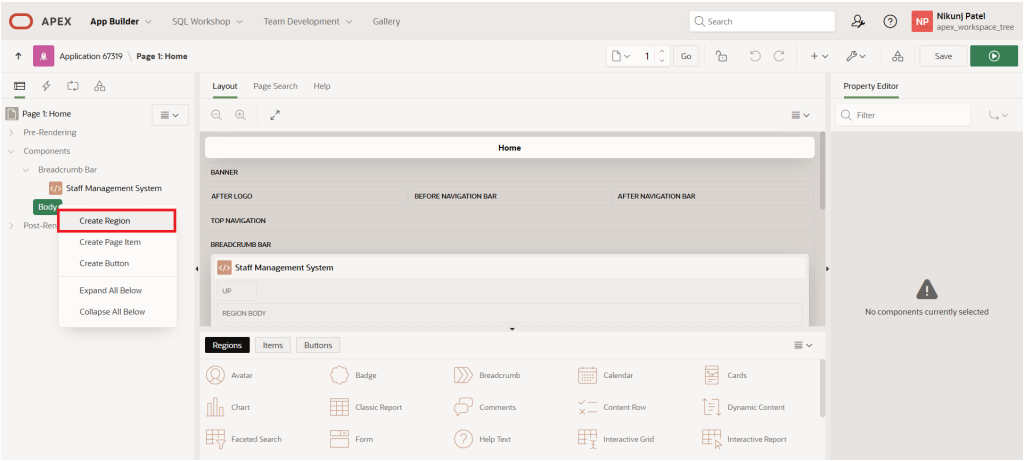
Now, on the Home page, right-click on the Body section. Oracle APEX will display a menu with multiple options. From this menu, select Create Region.
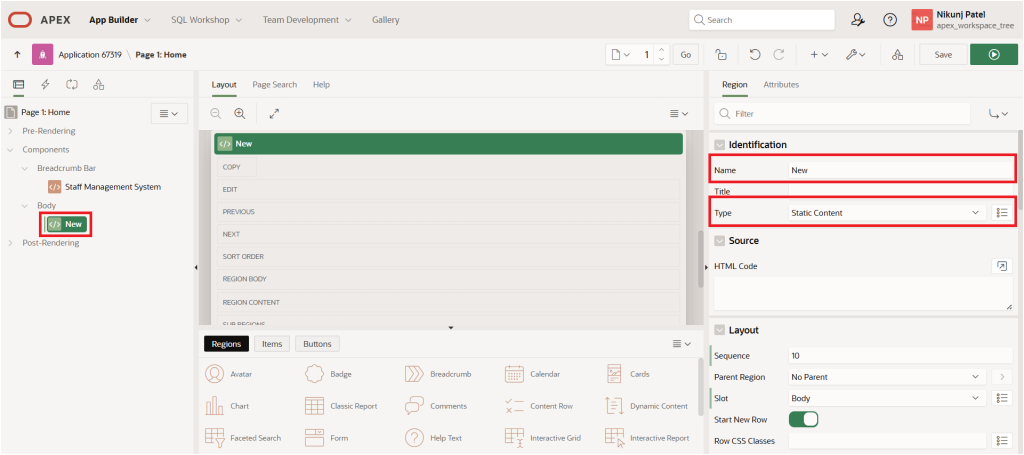
This action creates a new region on the APEX page with the Name set to New and the Type set to Static Content.
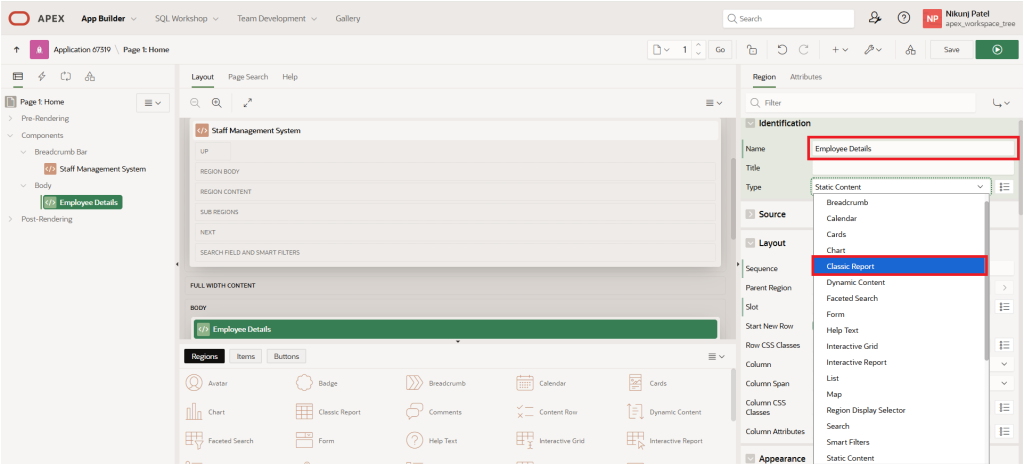
Now, change the Region Name to Employee Details and set the Region Type to Classic Report, as shown below.
Once you select Classic Report from the pop-up menu, an error appears in the Source section, indicating an issue with the Table Name property.
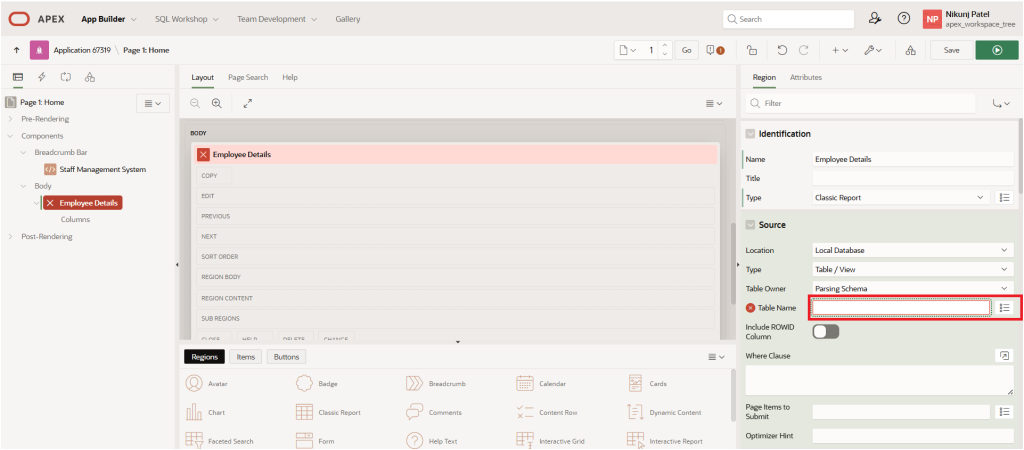
Rather than setting the Table Name property, we will use an SQL Query by changing the Type property.
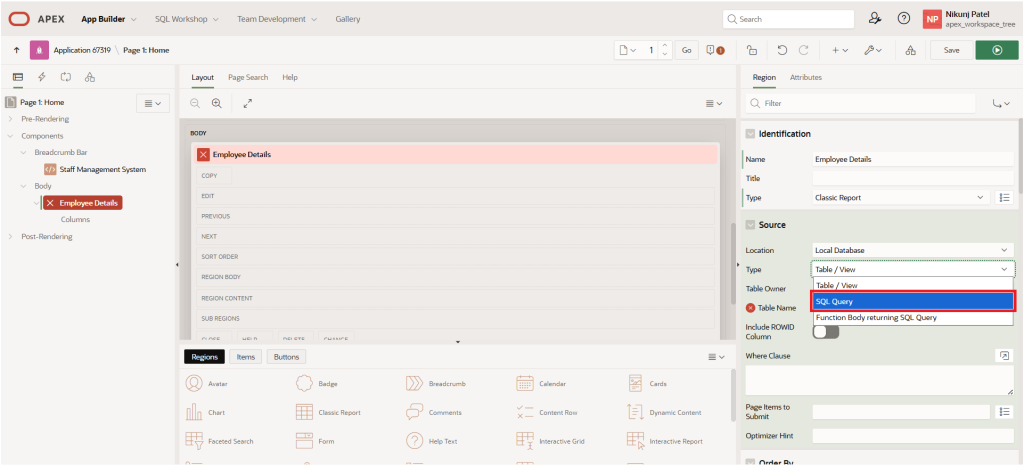
Once you select Source Type as SQL Query, you need to define the SQL Query property using an SQL command.
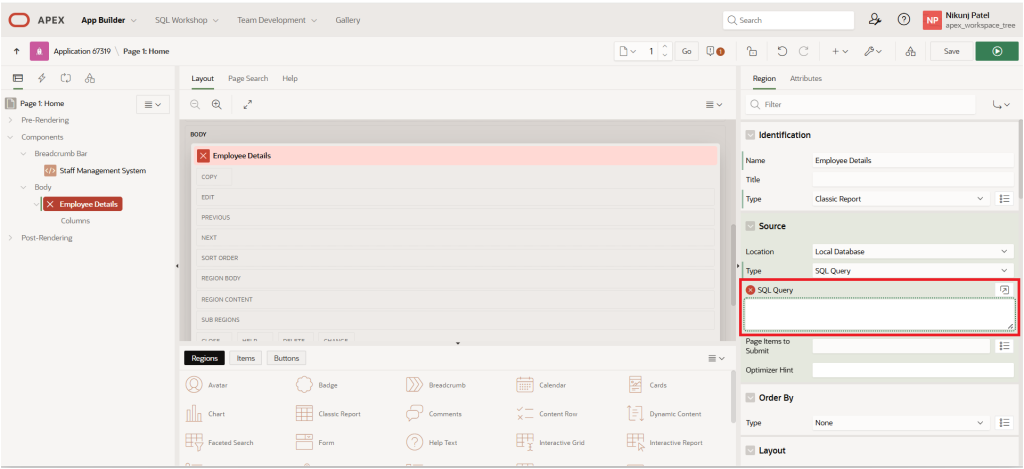
In the SQL Query property, enter the following simple SQL statement:
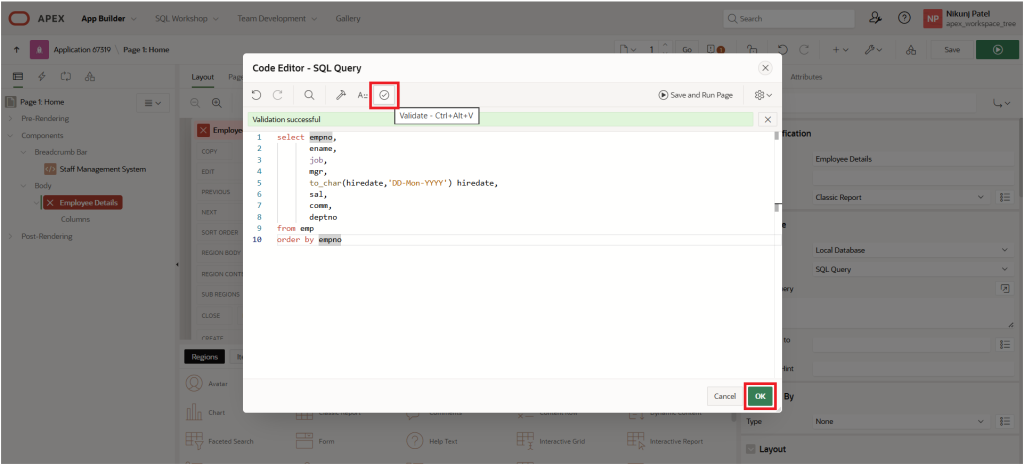
select empno,
       ename,
       job,
       mgr,
       to_char(hiredate,'DD-Mon-YYYY') hiredate,
       sal,
       comm,
       deptno
from emp
order by empno
Enter the above SQL query in the Code Editor – SQL Query section and validate it. Once the query is validated successfully, click the OK button.
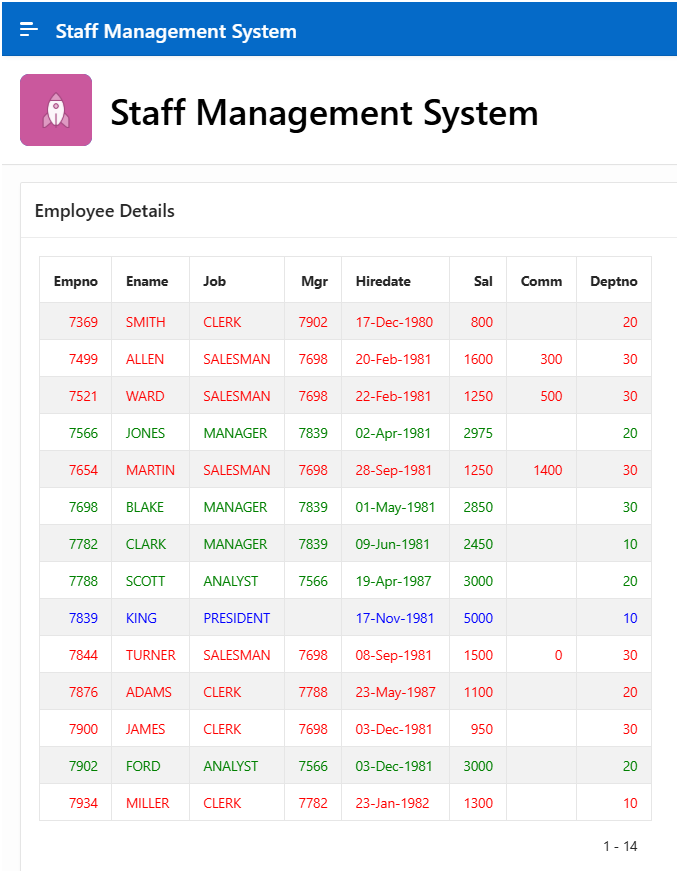
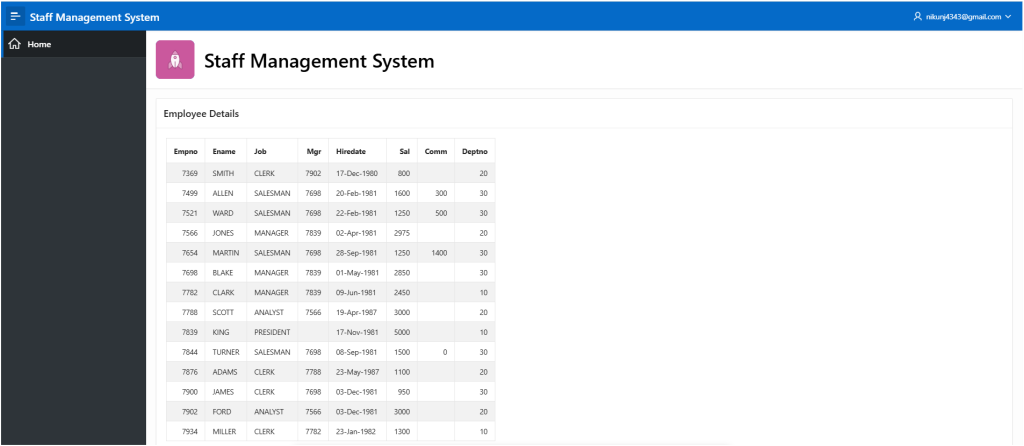
Now, click the Save button and run the page. After logging in to the system, the page will appear as shown in the following screen.
Step 2: Identify the Highlighting Condition
Decide what rule you want to apply, such as:
Based on the SAL column, We defined three salary categories:
Low Salary
- SAL < 2000
- Row class:
low-sal
Medium Salary
- SAL BETWEEN 2000 AND 4000
- Row class:
med-sal
High Salary
- SAL > 4000
- Row class:
high-sal
Based on these conditions, we will group the row classes into three categories: low-sal, med-sal, and high-sal.
case
    when sal < 2000 then 'low-sal'
    when sal between 2000 and 4000 then 'med-sal'
    else 'high-sal'
end as row_class
Next, update the Classic Report SQL Query using the following SQL code, based on the conditions defined above.
select empno,
       ename,
       job,
       mgr,
       to_char(hiredate,'DD-Mon-YYYY') hiredate,
       sal,
       comm,
       deptno,
       case
            when sal < 2000 then
                'low-sal'
            when sal between 2000 and 4000 then
                'med-sal'
            else
                'high-sal'
       end as row_class
from emp
order by empno
Validate the above query in the Code Editor – SQL Query pop-up region.
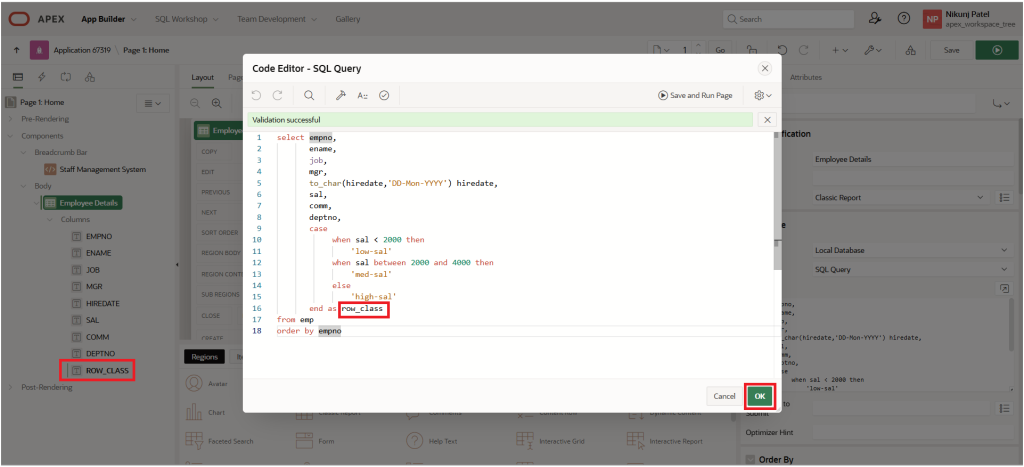
Click the OK button, then click Save to save the page.
Step 3: Setup in APEX Classic Report
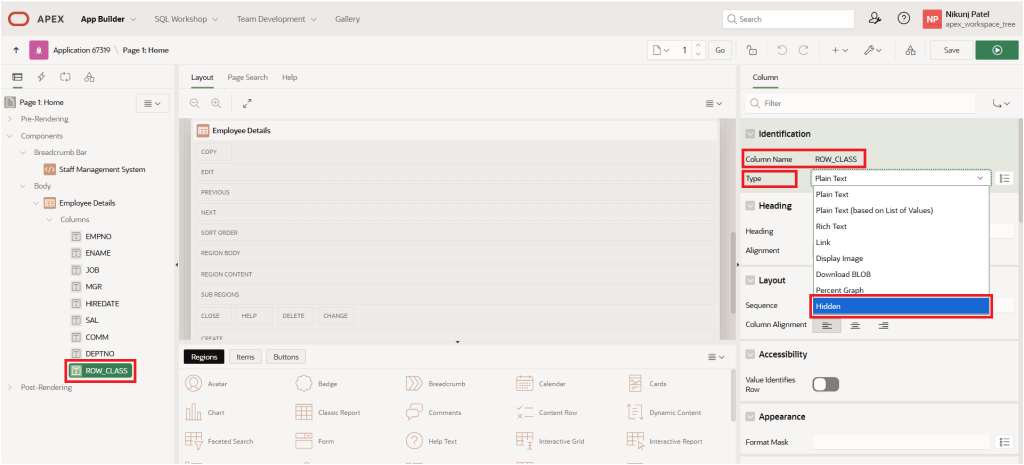
- For the new column ROW_CLASS:
- Set Type: Hidden
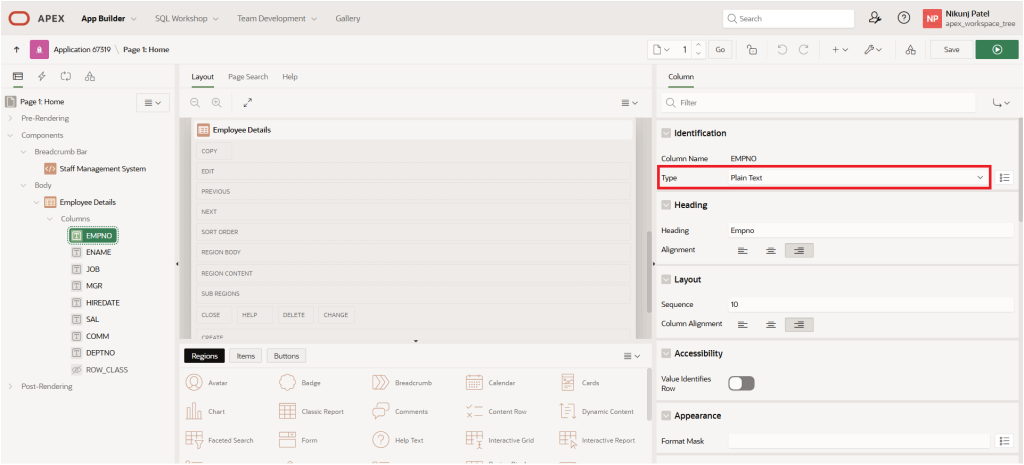
2. For each visible column (EMPNO, ENAME, JOB, MGR, HIREDATE, SAL, COMM, DEPTNO):
Go to the Column Properties.
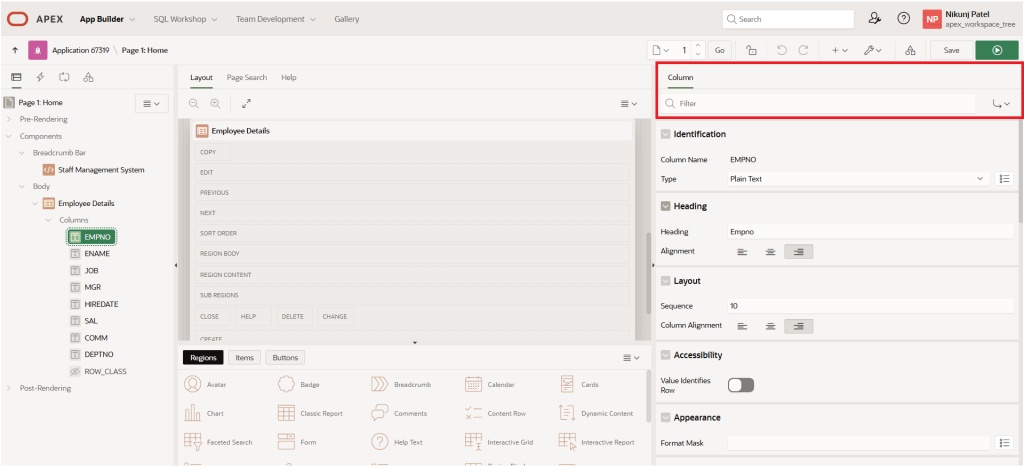
Set the Type property to Plain Text.
Change the Escape special characters setting to No.

In the HTML Expression property, enter following code:
<span class="#ROW_CLASS#">#COLUMN_VALUE#</span>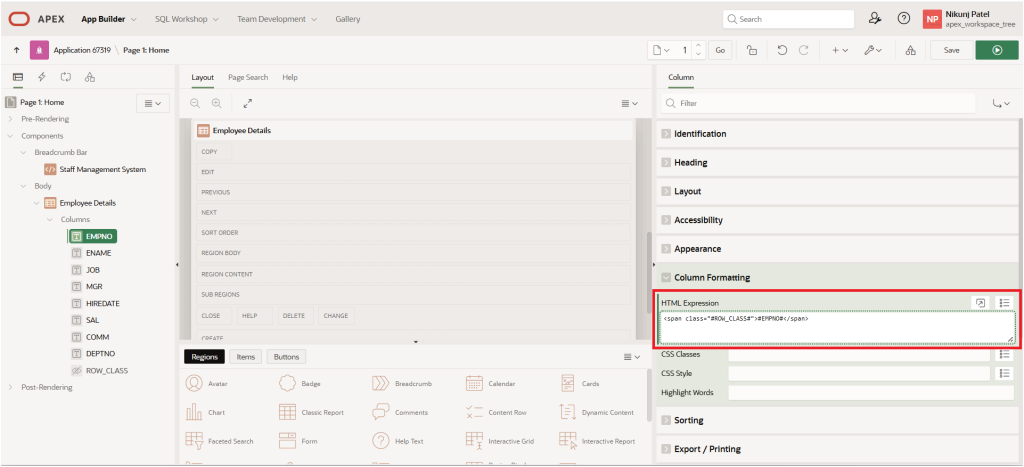
Note: (Replace #COLUMN_VALUE# with the actual substitution, e.g., #EMPNO#, #ENAME#, #JOB#, #MGR# etc. You need to do this individually for each column.)
3. Add the required Page CSS to define the colors.
Open Page Properties, then go to CSS → Inline.
Add the following CSS code in the Inline page property:
.low-sal {
           color: red !important;
}
.med-sal {
           color: green !important;
}
.high-sal {
           color: blue !important;
}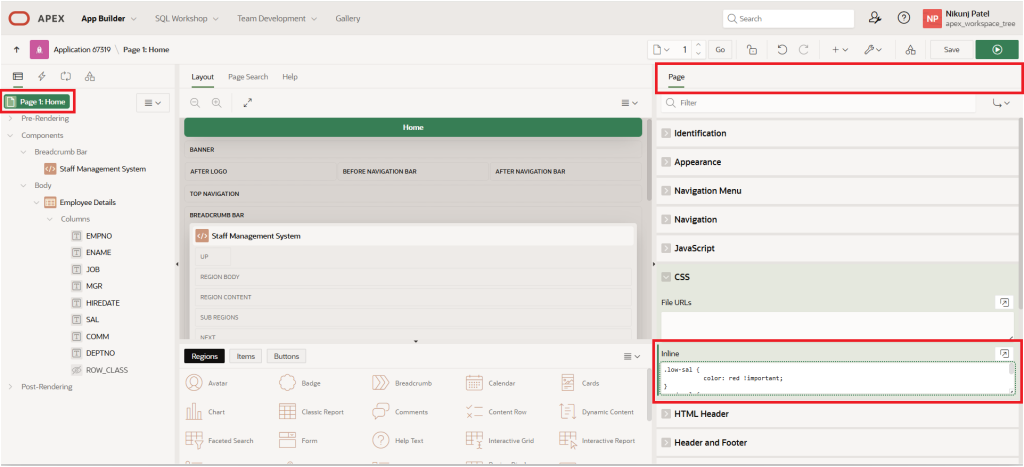
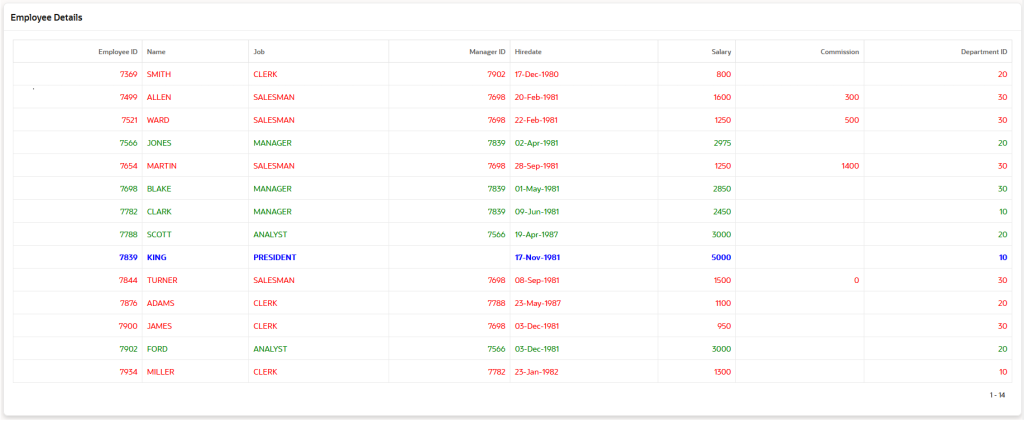
Now, save the changes and run the page. It will appear as shown in the screenshot below.