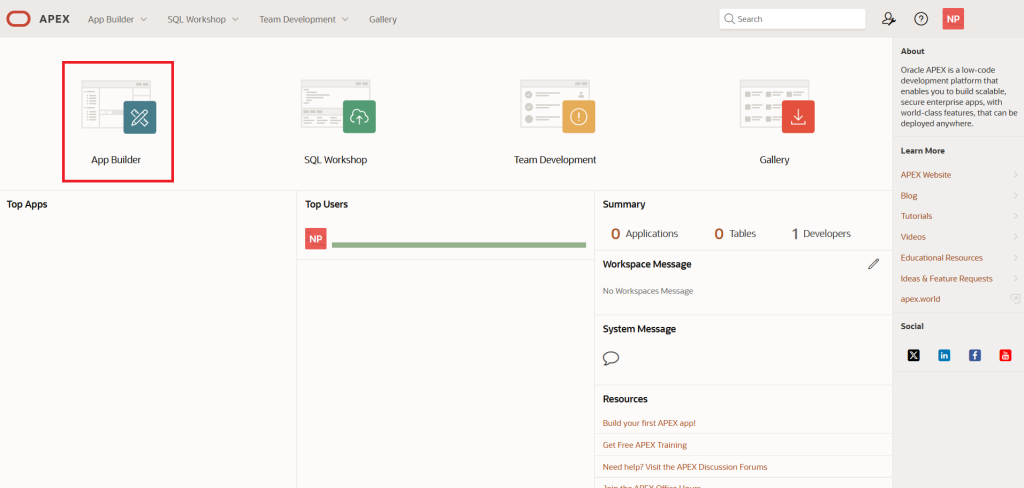
After logging in to the APEX workspace, click on the Application Builder option to create a new APEX web application.
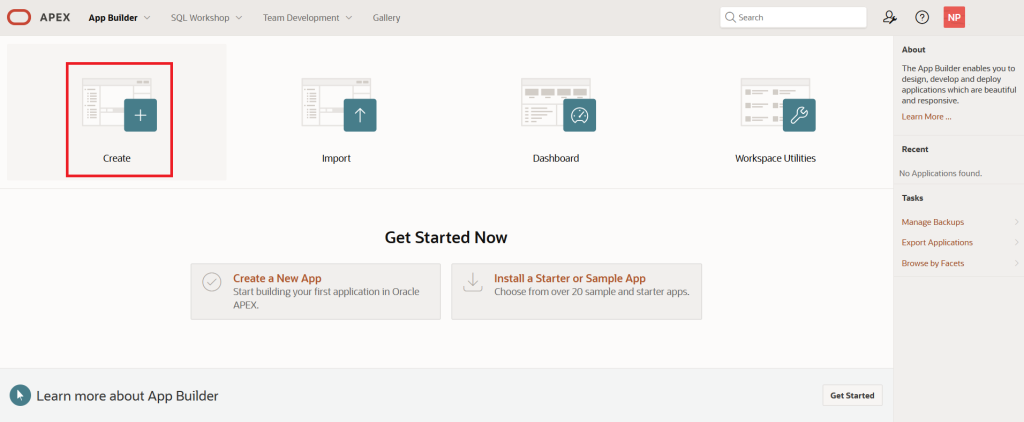
Next, click on the Create button to start building a new application.
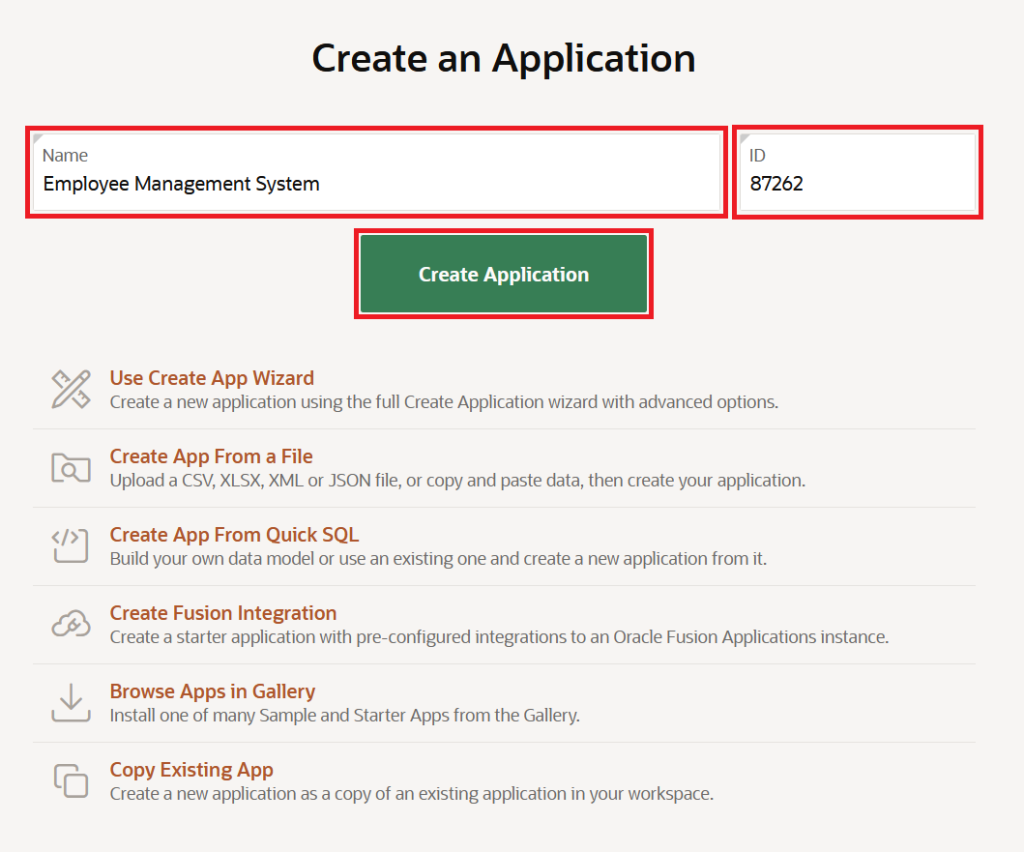
Now, enter the application name (e.g., Employee Management System) and use the default application ID suggested by the system — in our case, it is 87262.
Click on the Create Application button to generate the Employee Management System application.
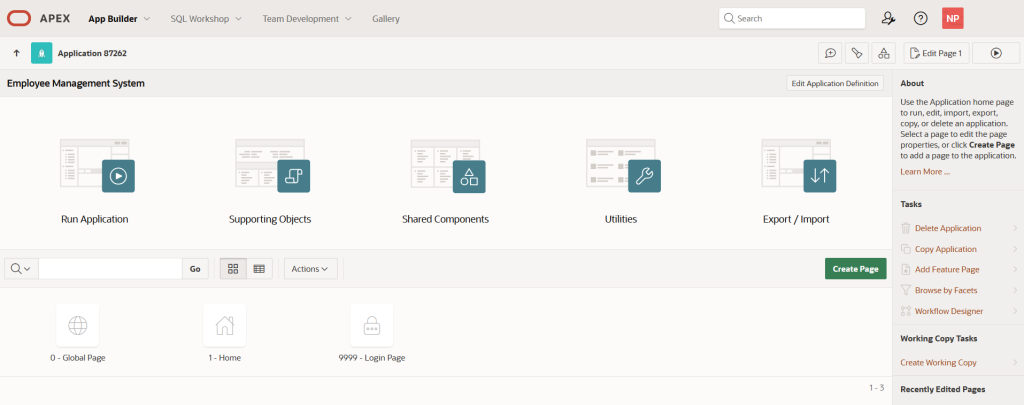
After you click the Create Application button, you will be redirected to the home page of the Employee Management System application.
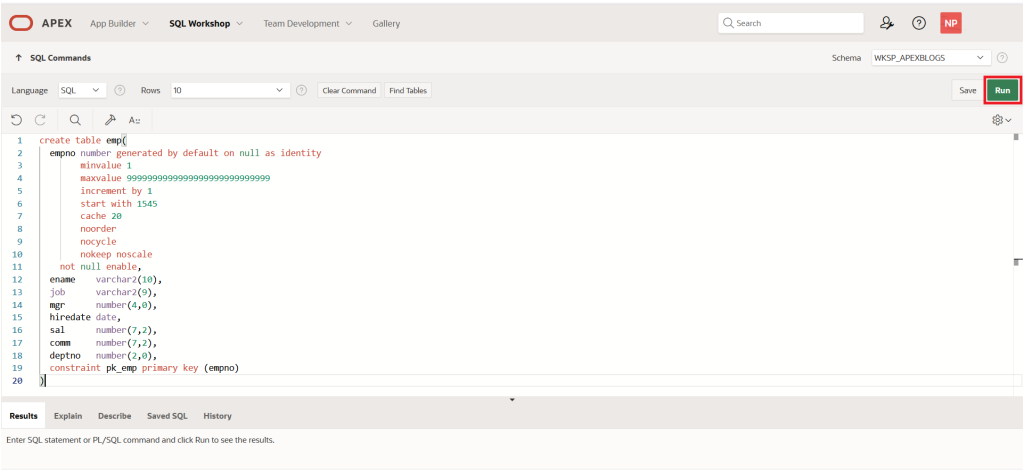
Before creating a new form based on a SQL query, we first need to create the required table using the SQL Command Prompt. Following EMP table will be used in the SQL query for building the APEX form.
SQL script for the EMP table, which stores employee details.
create table emp(
empno number
generated by default on null as identity
minvalue 1
maxvalue 9999999999999999999999999999
increment by 1
start with 1545
cache 20
noorder
nocycle
nokeep
noscale
not null enable,
ename varchar2(10),
job varchar2(9),
mgr number(4,0),
hiredate date,
sal number(7,2),
comm number(7,2),
deptno number(2,0),
constraint pk_emp primary key (empno)
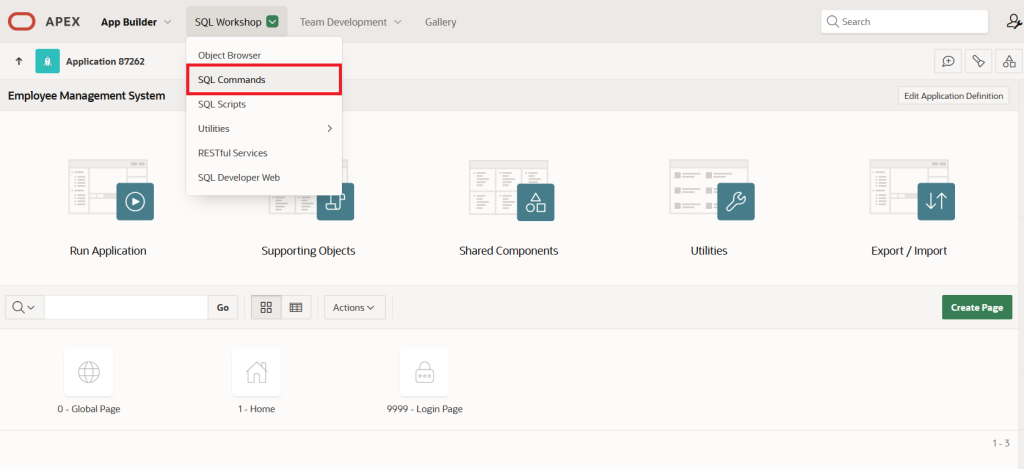
)On the Application Home page, you will find a feature called SQL Workshop, where you can execute the above SQL command.
SQL Workshop → SQL Commands
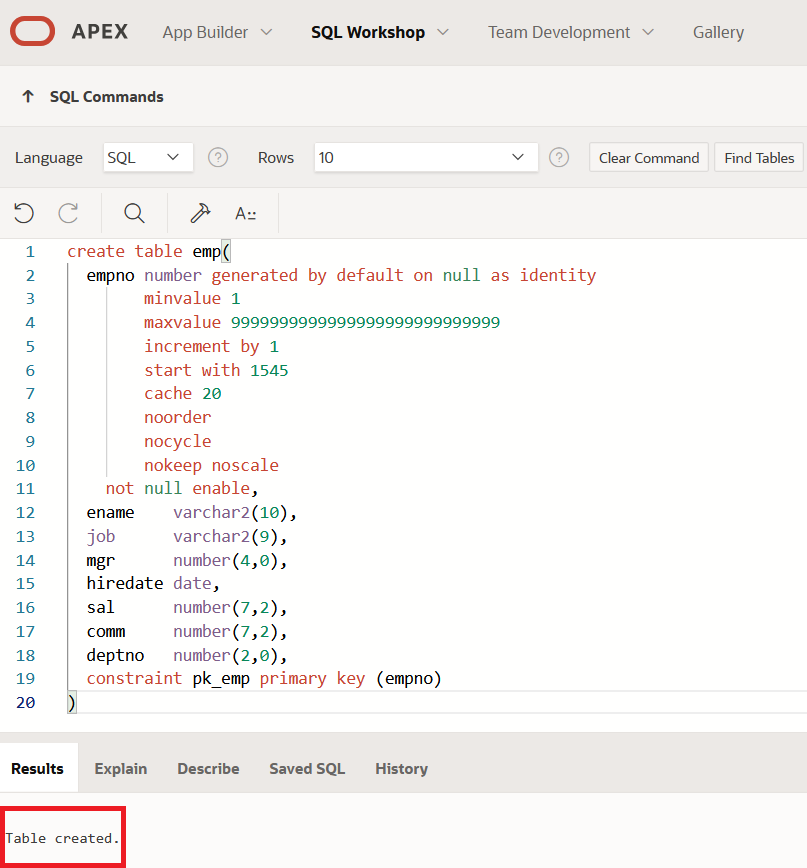
In the SQL Commands prompt, enter the SQL statement and click the Run button to create the EMP table.
If the SQL query is correct, it will be processed successfully and a confirmation message will appear in the output prompt.
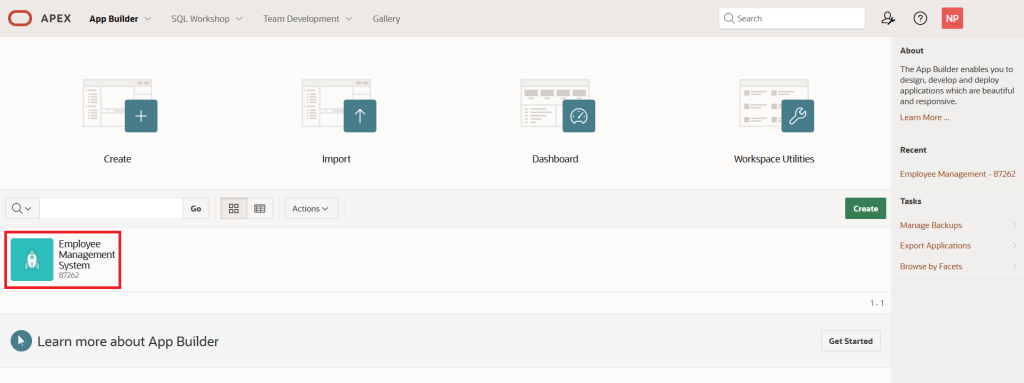
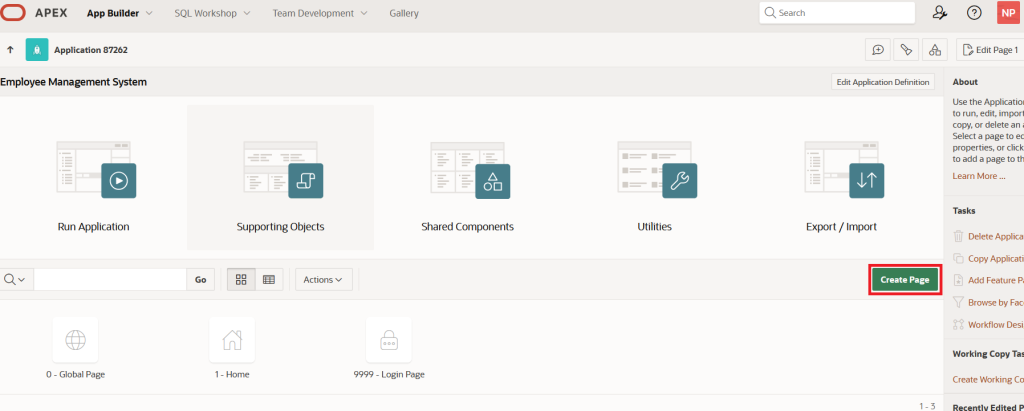
Now, click on the App Builder option next to SQL Workshop to return to the App Builder Home page, where you will see the Employee Management System application you created.
On the Employee Management System application home page, click the Create Page button to add a new page with a form region based on a SQL query.
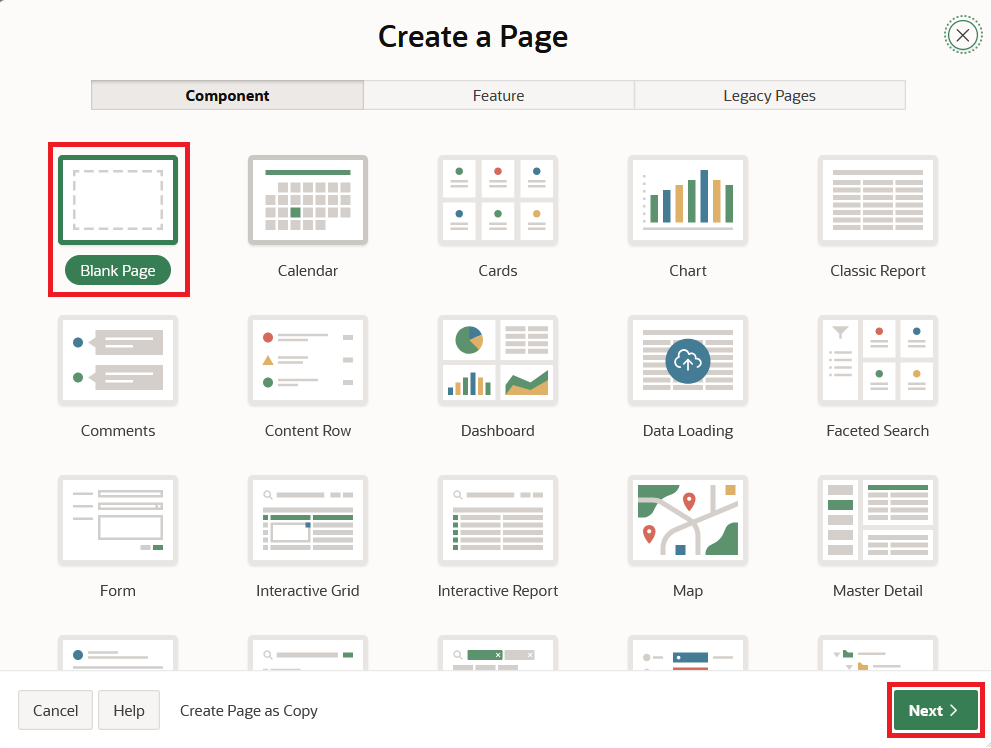
Clicking the Create Page button opens a dialog called Create a Page. Here, select Blank Page (which is selected by default in APEX) and then click Next.
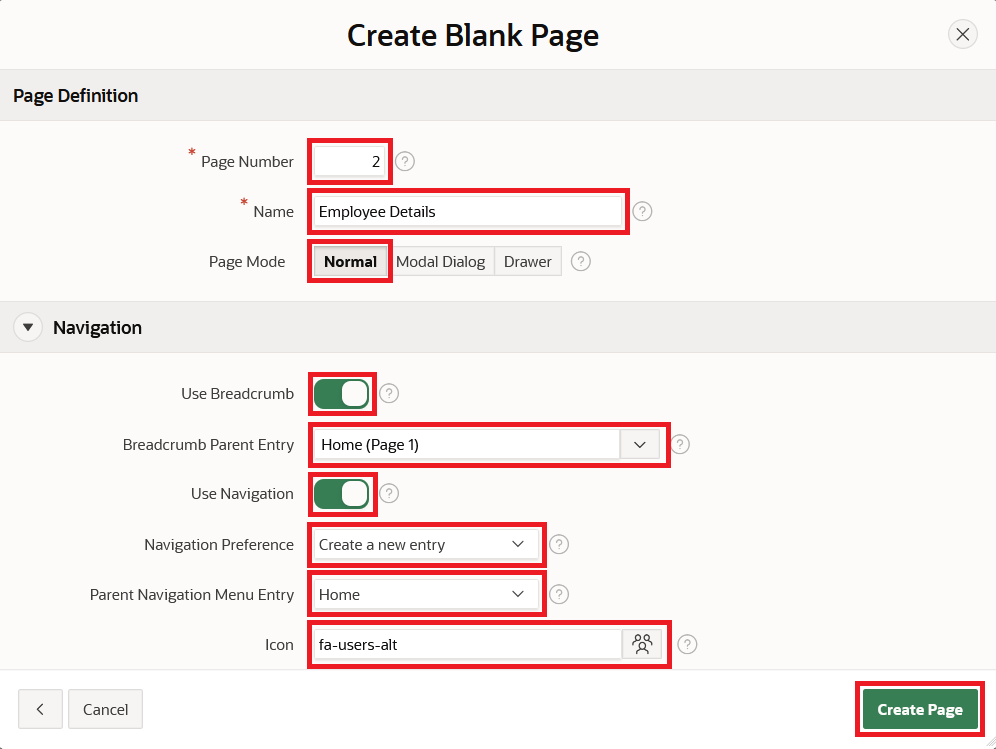
After clicking the Next button, APEX opens the Create Blank Page screen with two regions — Page Definition and Navigation — having the following properties:
Page Definition region:
Page Number: 2
Name: Employee Details
Page Mode: Normal
Navigation region:
Use Breadcrumb: On
Breadcrumb Parent Entry: Home (Page 1)
Use Navigation: On
Navigation Preference: Create a new entry
Parent Navigation Menu Entry: Home
Icon: fa-users-alt
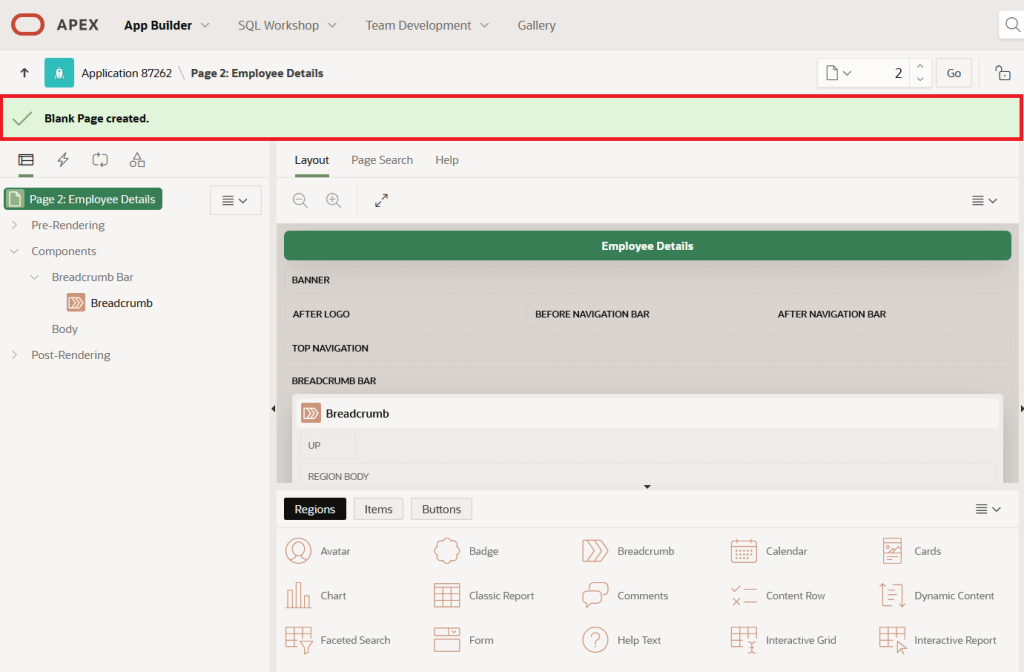
After clicking the Create Page button, you will be redirected to Page 2 — Employee Details — in the Page Designer UI.
Next, go to the Body component of the page and add a new region.
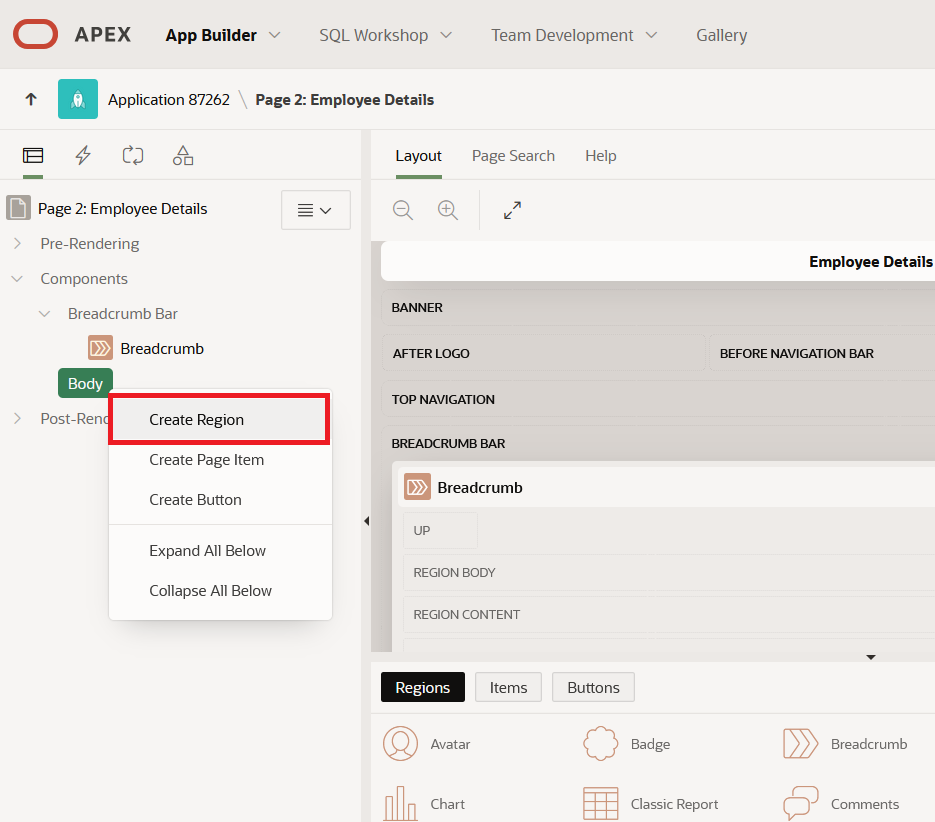
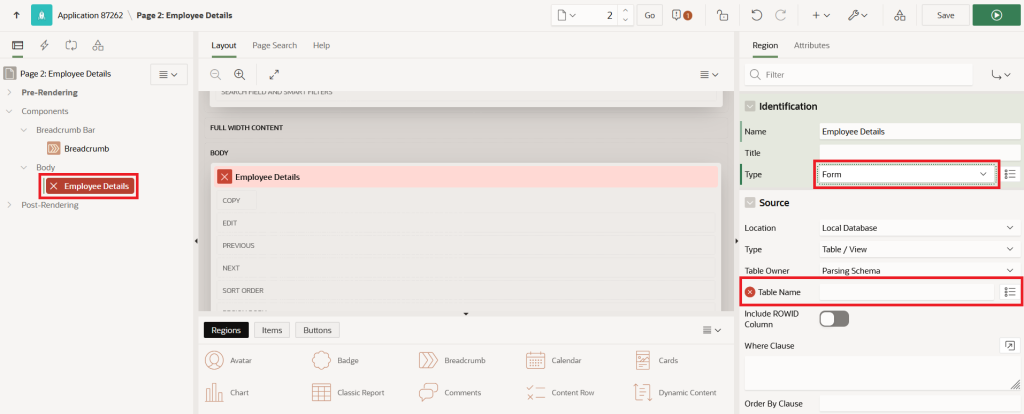
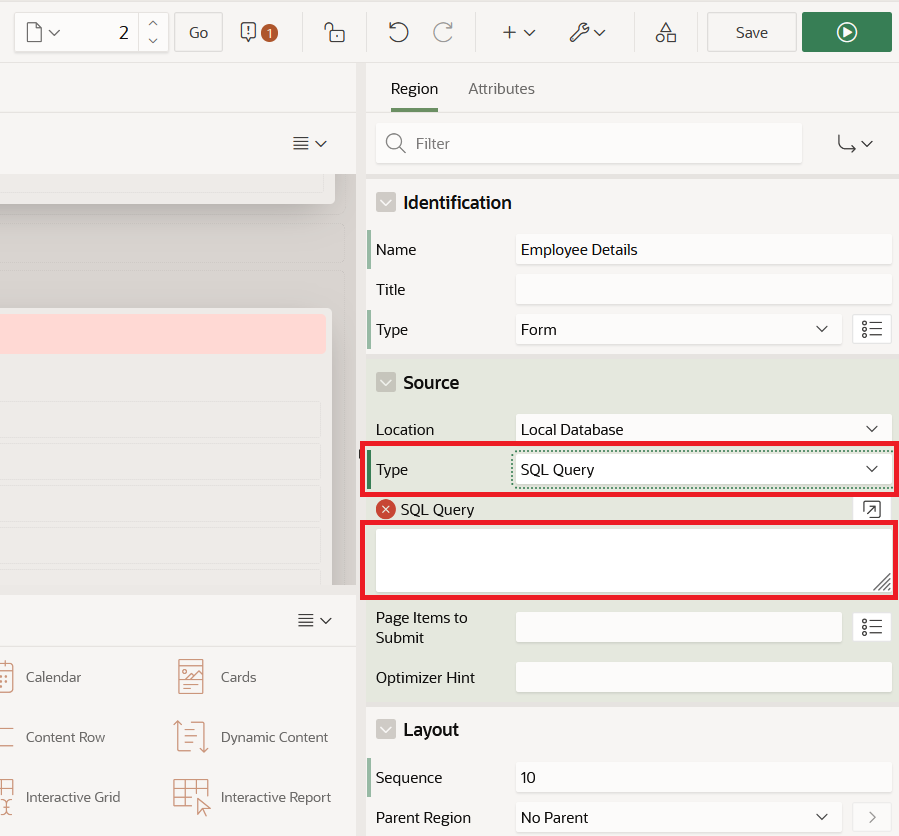
Go to the Identification section, name the region Employee Details, and set the region type to Form..

After choosing Form as the region type, APEX sets the Type property to Table/View. It will then ask for a Table Name.
Since no value is entered by default, you’ll see an error message.
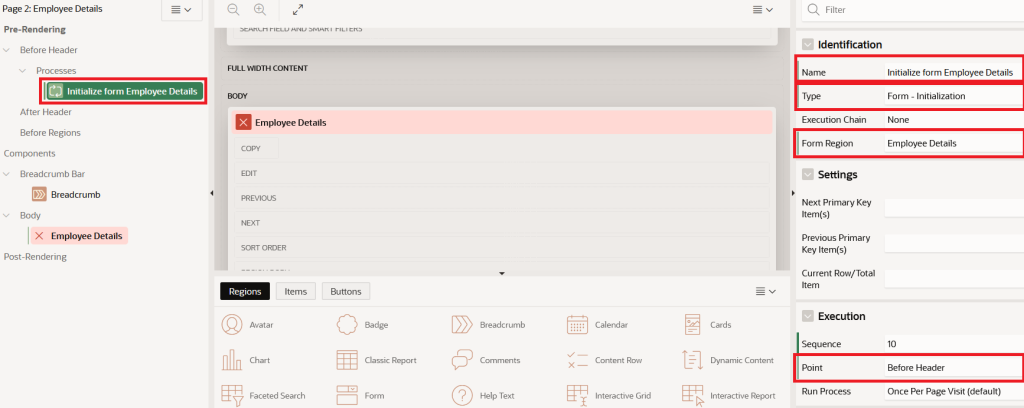
Additionally, when the region type is set to Form, APEX automatically creates a system process in the Pre-Rendering section of Page 1 named Initialize Form Employee Details, with the type set to Form – Initialization.
The Form – Initialization process sets up the form region items. It can retrieve data from the region source based on primary key values or assign initial default values to the form fields.
By default, APEX configures this process as follows:
Identification Name: Initialize Form Employee Details
Type: Form – Initialization
Form Region: Employee Details
Execution Point: Before Header (runs before the page renders)
Keep all process settings as they are and use the default values provided by APEX.
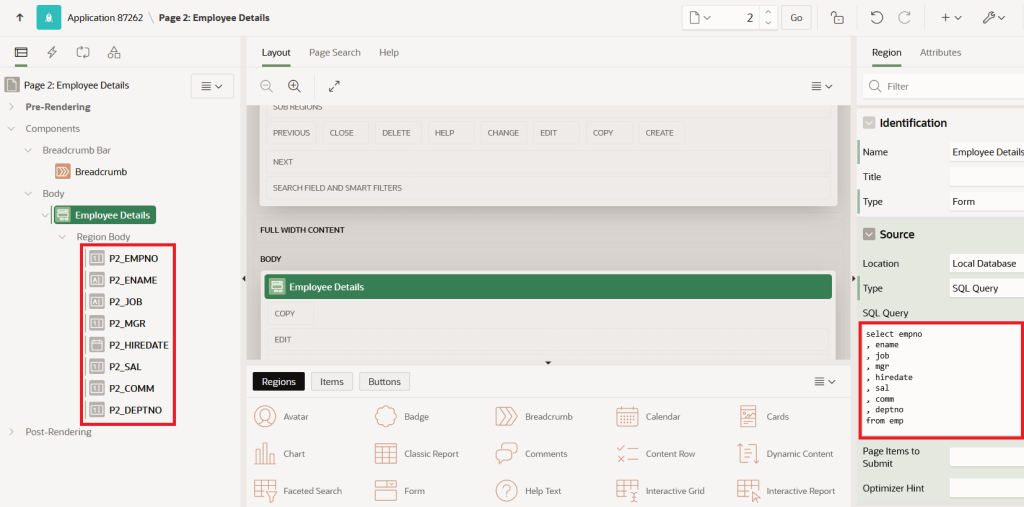
Now, return to the Employee Details region and change the Type property from Table/View to SQL Query.
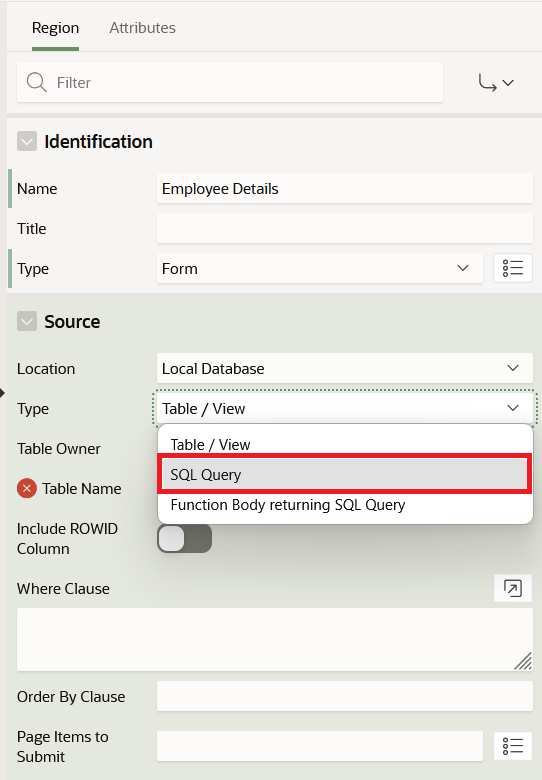
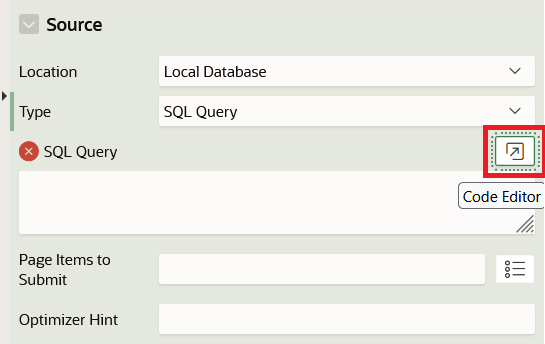
Once you set the Type to SQL Query, a SQL Query Code Editor field will appear where you can enter your SQL query.
Now, type the following SQL query in the SQL Query Code Editor:
select empno
, ename
, job
, mgr
, hiredate
, sal
, comm
, deptno
from emp
Click the Code Editor button to open the SQL Query Code Editor, then validate your SQL query to ensure it runs correctly.
Make sure to validate your SQL query before saving the page changes.
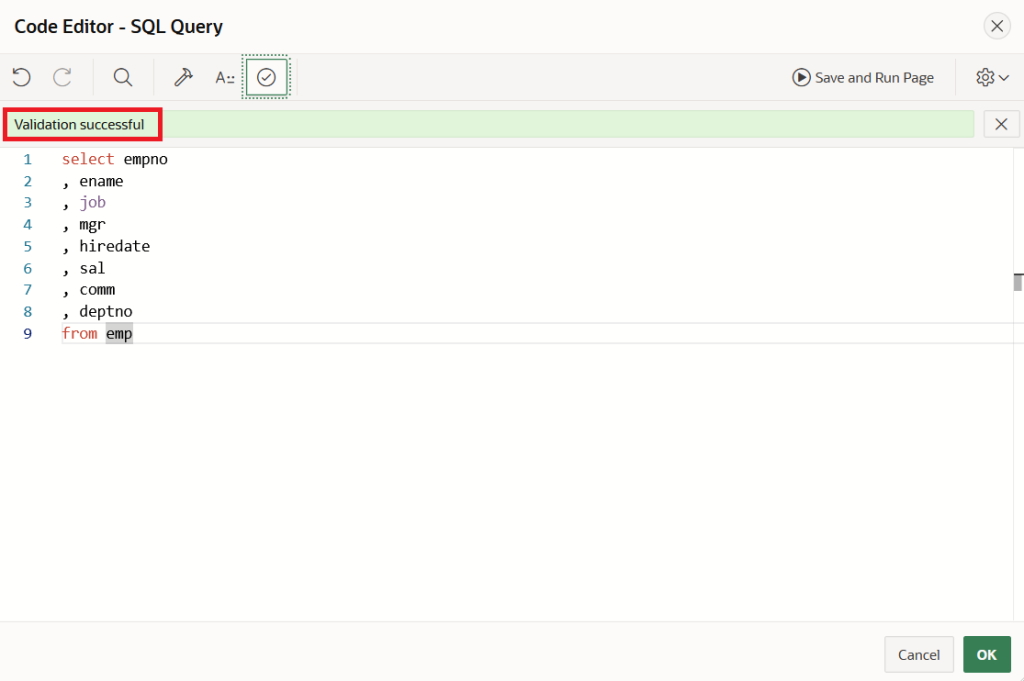
After successfully validating your SQL query, click OK to confirm.
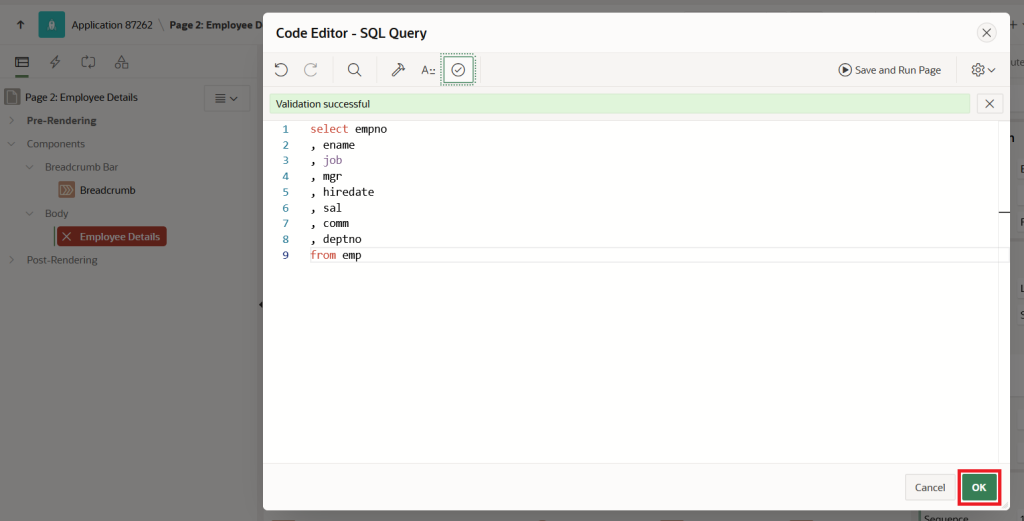
After clicking the OK button, you will be redirected to the Page Designer for the Employee Details page, where all column values will be displayed as form items.
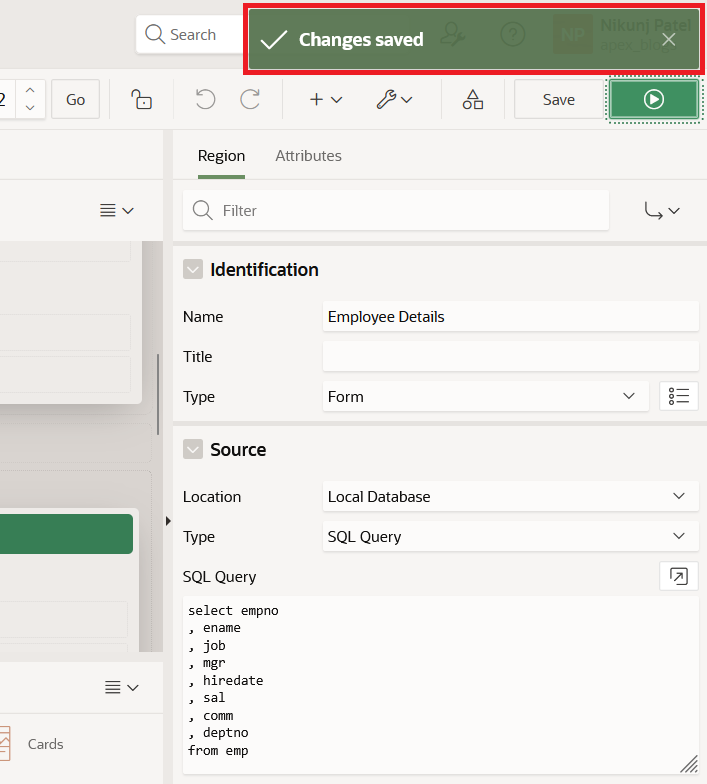
Now, click Save button to save your changes.
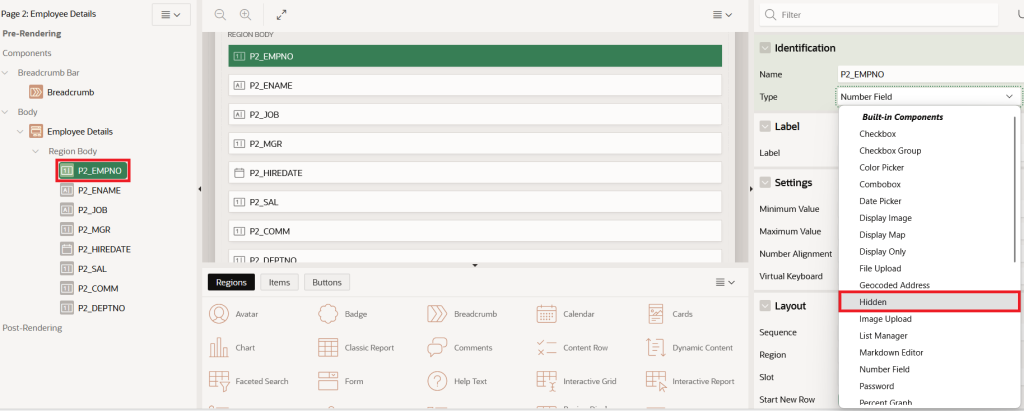
Next, we will define the primary key for the EMP table by setting the P2_EMPNO item type to Hidden.
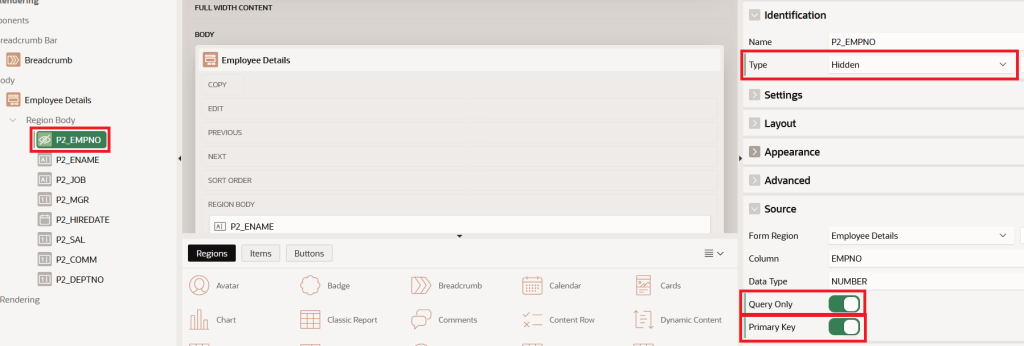
Now, go to the Source section of the P2_EMPNO item, turn on the Query Only and Primary Key options, and save the changes.
Next, to allow the form to handle insert, update, and delete operations, add a DML process under the Processes section of the page.
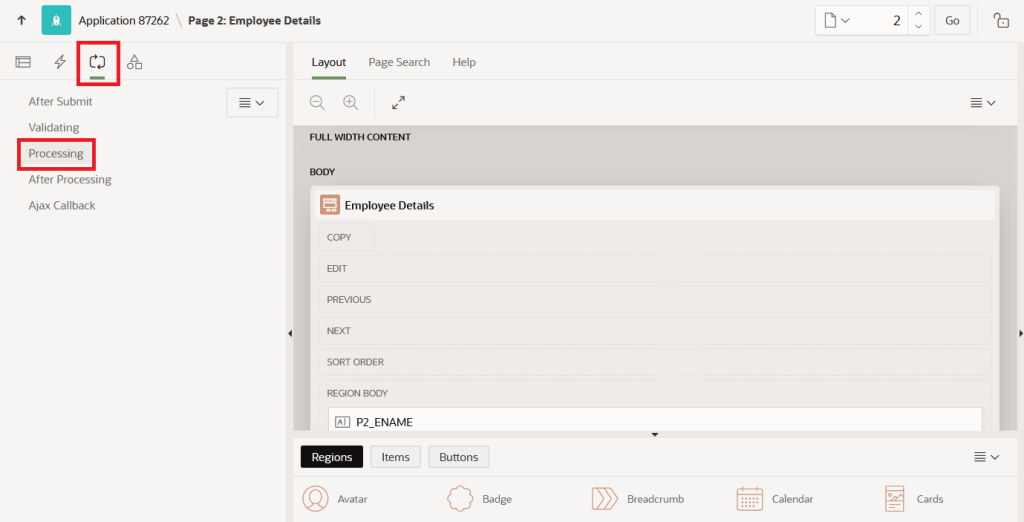
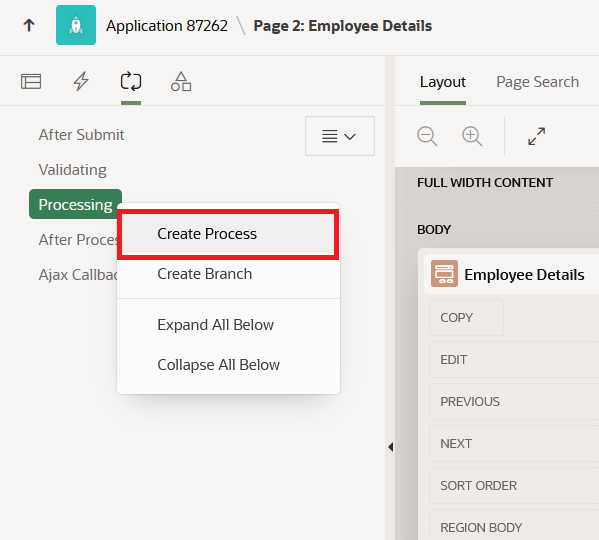
Next, right-click the Processing tab and choose Create Process to add a new process.
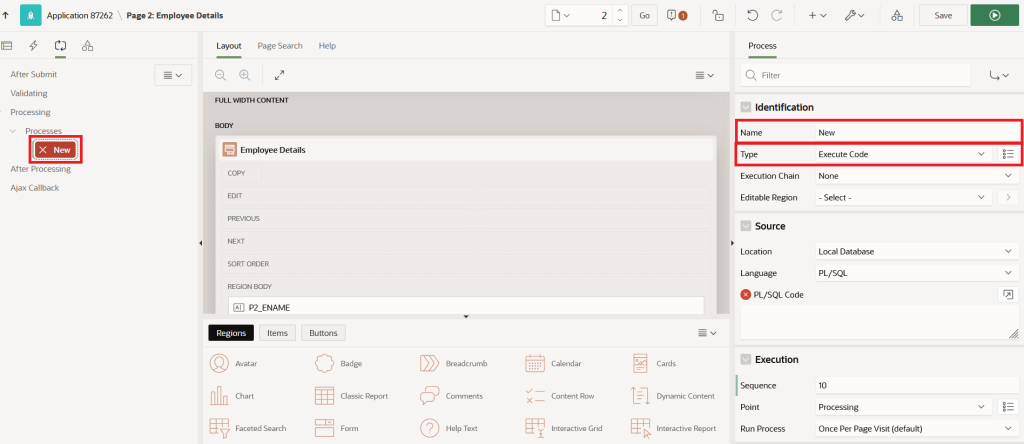
A new process will be added with the default settings: Name = New and Type = Execute Code.
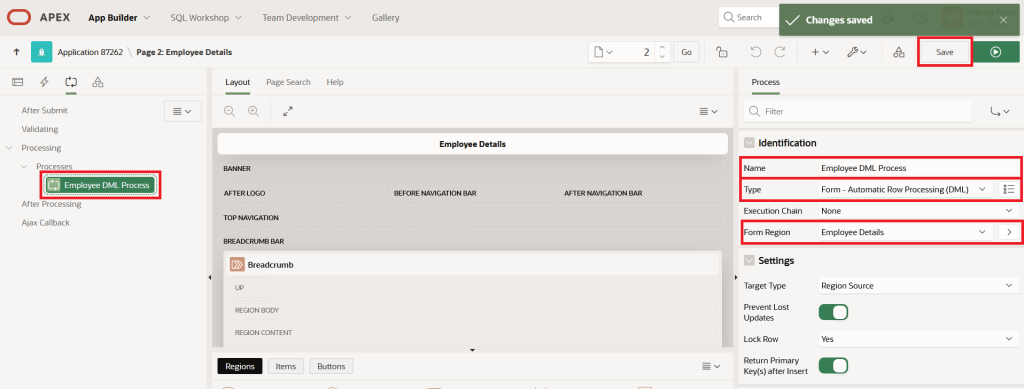
Configure the DML process with the following properties and save the changes. This process will execute on every form submission, performing INSERT, UPDATE, and DELETE operations:
Name: Employee DML Process
Type: Form – Automatic Row Processing (DML)
Form Region: Employee Details
Now, let’s create a Branch component. This ensures that once a new employee record is added and the form is processed, the user is redirected back to Home Page 1.

APEX will create a branch without a name, and you’ll see an error since the Target property is not yet specified.
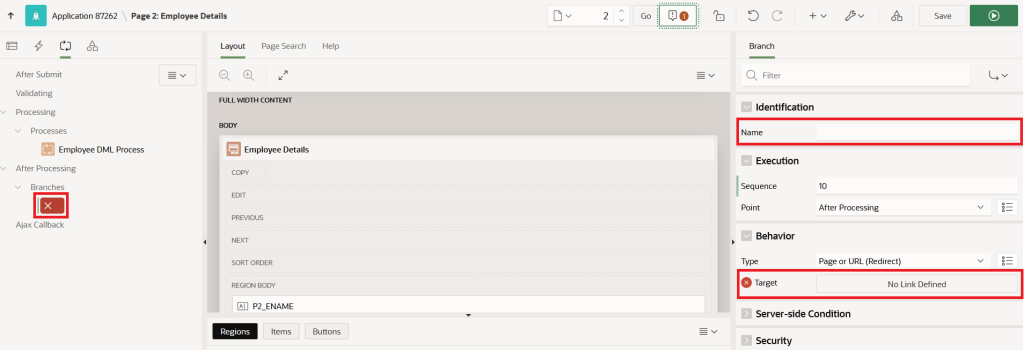
Now, give the branch a proper name and specify the Target property to define where the page should redirect after form submission.
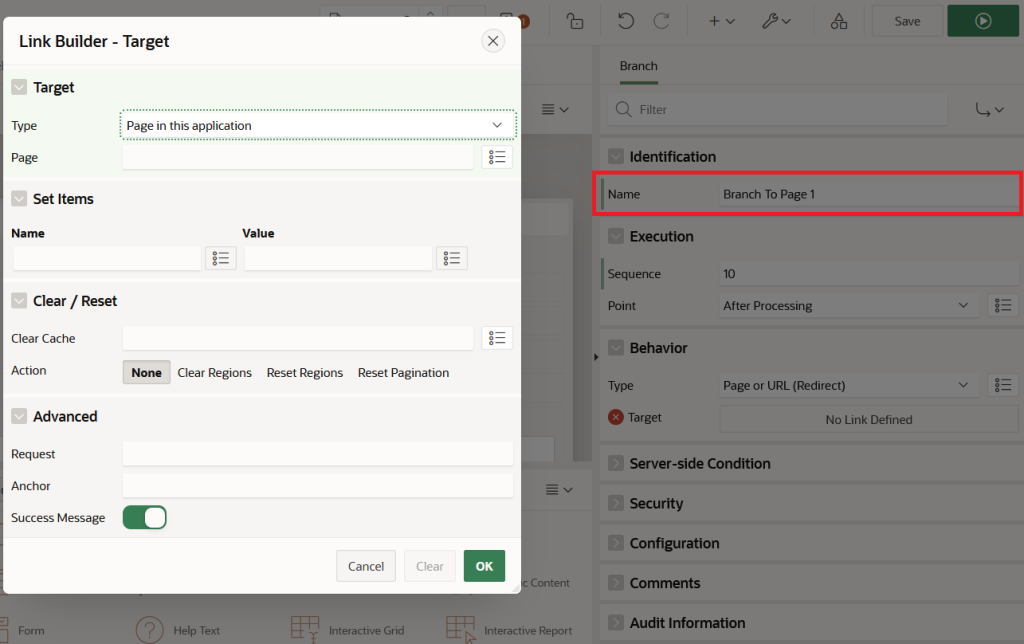
Here, set the Target property, keeping the default Type as Page in this application.
Set Page property to 1 (Home Page) and take default value on of Success Message property and save the changes
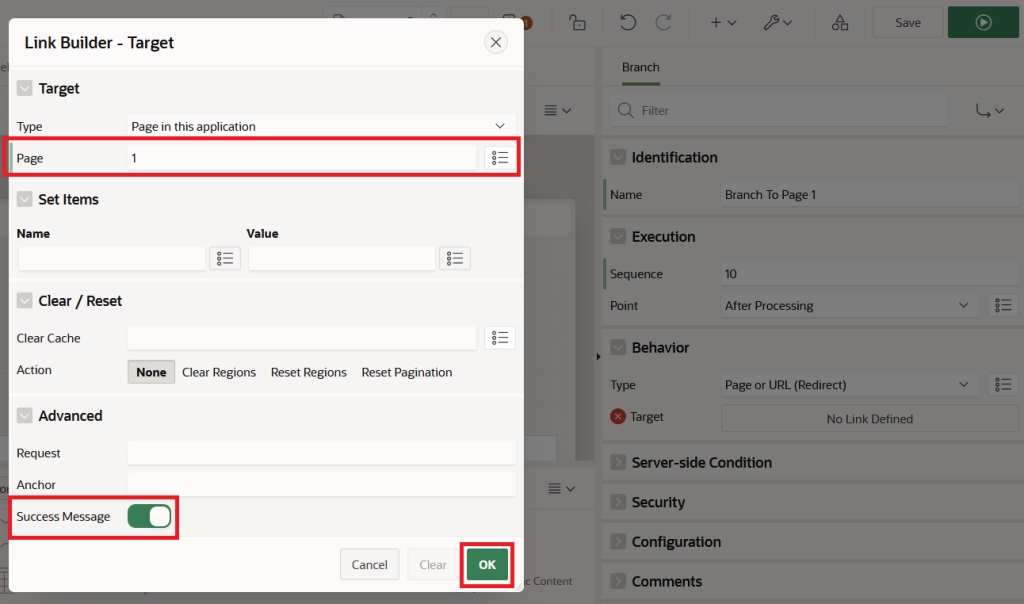
Once the branch’s Target property is set, click Save to apply the changes.
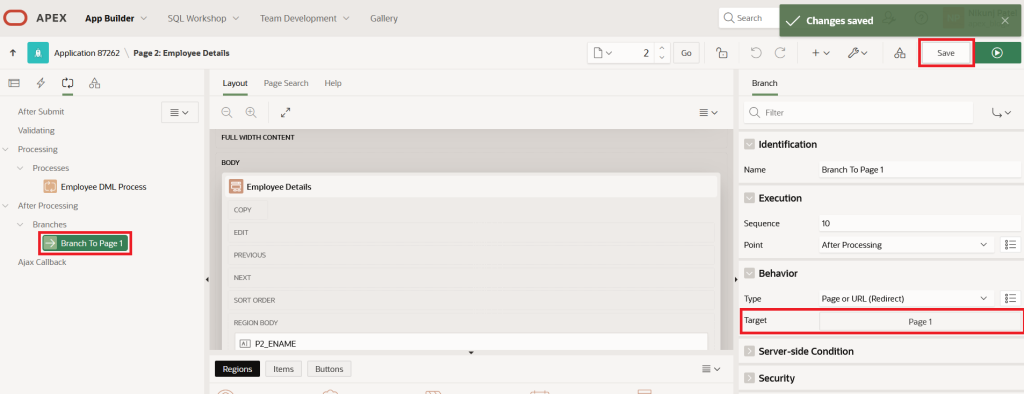
With these settings, the branch will execute every time the page is submitted.
Now, let’s add a Create button. This button will submit the form, insert the new employee data into the EMP table, and then redirect the user to Home Page 1 via the branch that runs after submission.
Next, in the Page Rendering section, choose the first option from the left panel to add the Create Button to this page, as shown below:
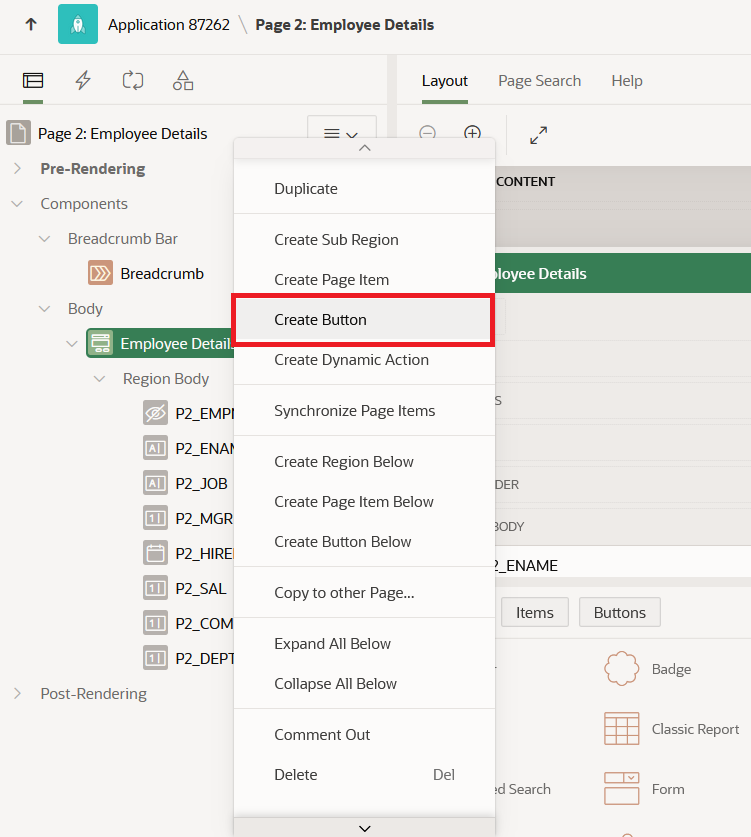
This action will generate a New button, as shown below:
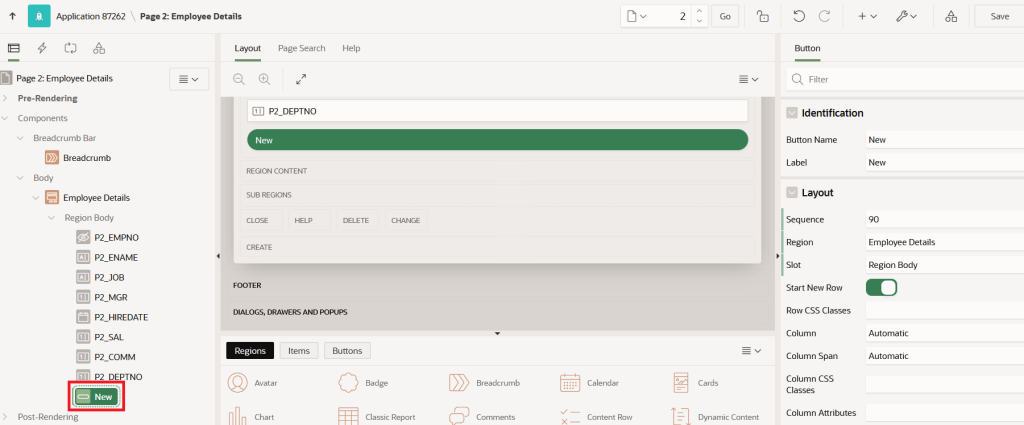
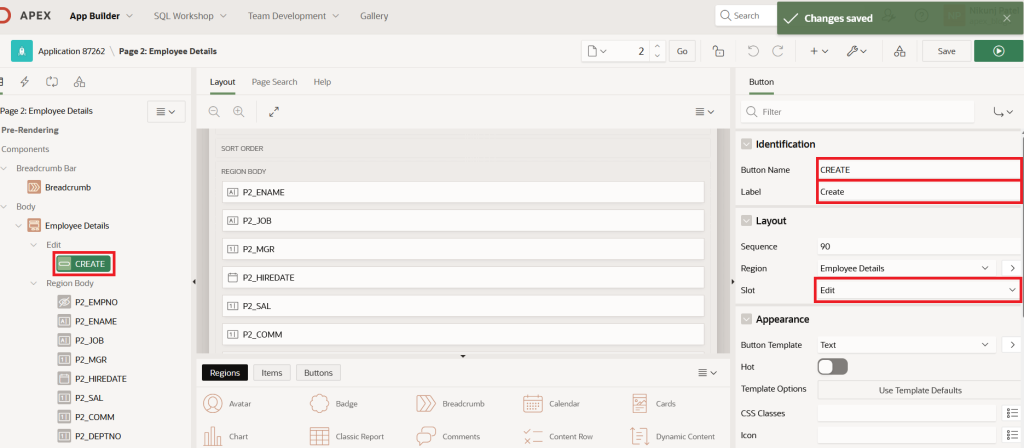
Now, set the properties of the new button as follows and save your changes:
Button Name: CREATE
Label: Create
Slot: Edit (select the desired position within the region)
Before using the Employee Details form on Page 2 to add new Employee records, let’s create a Classic Report on Home Page 1 to show all employee records added via the form.
Now, on Home Page 1, click on the Body component to add a new region for the Classic Report.
Set the following properties and save the page:
Name: Employee Details
Type: Classic Report
SQL Query:
select * from emp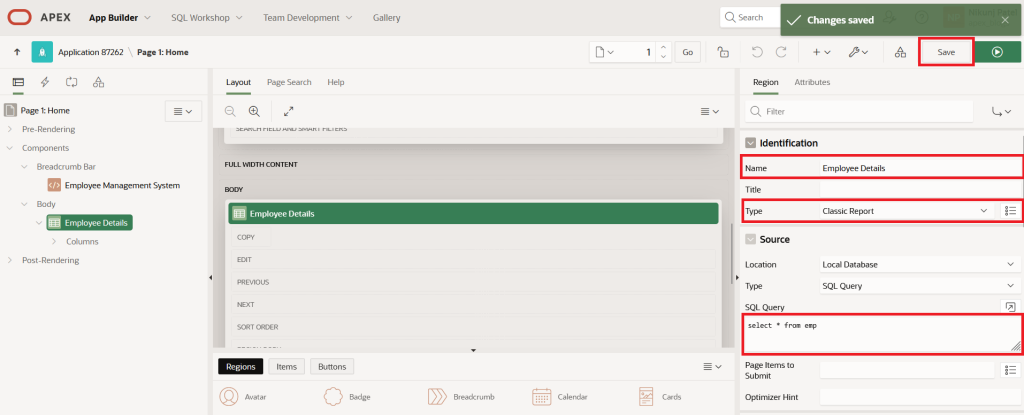
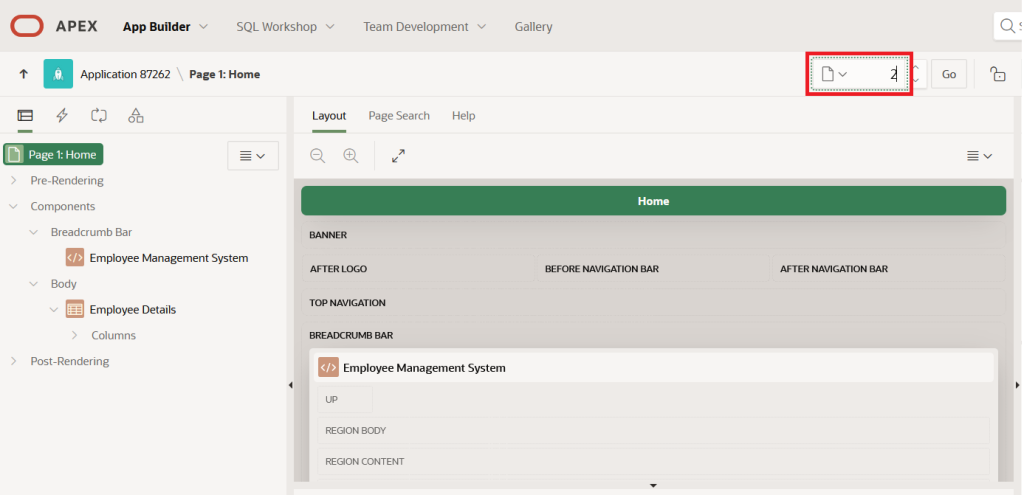
Next, to run the Employee Details form on Page 2, type ‘2’ in the Page Finder from Page 1 and press Enter. This will take you directly to Page 2.
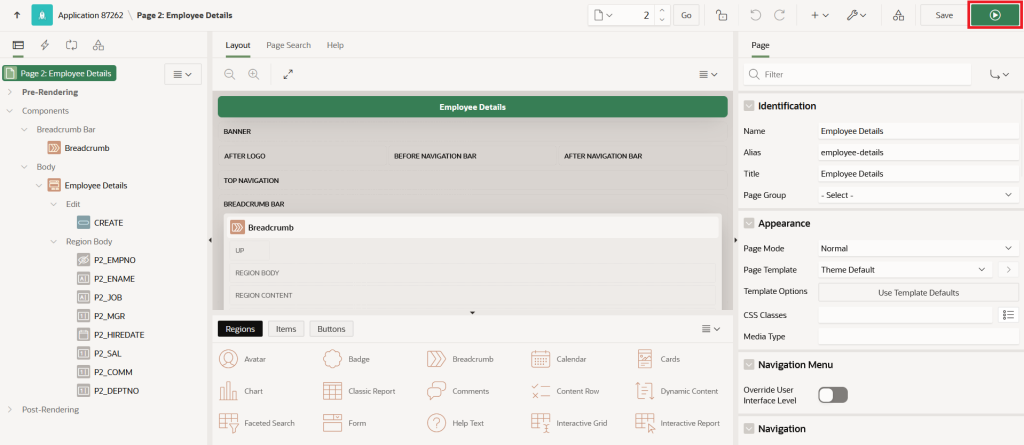
Next, Run Page 2 (Employee Details) to see the form in action and check the output.
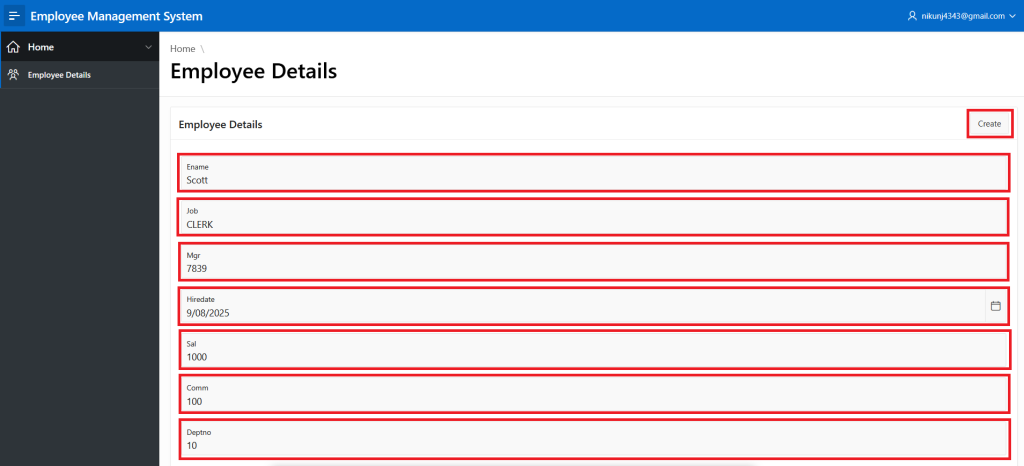
Fill in the employee information in the form and click Create to add the new record.
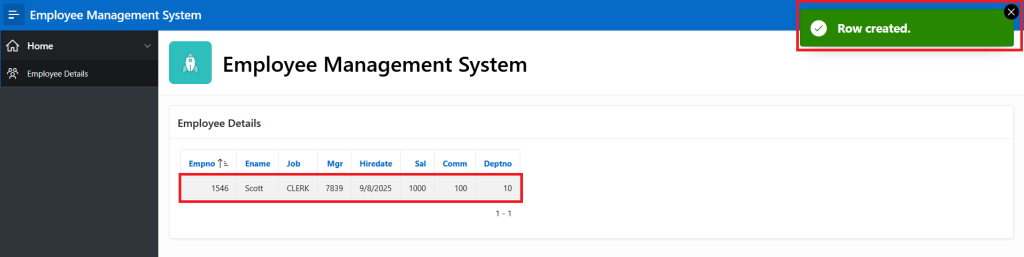
Once the employee record is added, you will be redirected to Home Page 1. The Classic Report will show the new record and display a Row Created message
I welcome your thoughts or questions in the comments — I’d love to hear from you! Thanks for reading.